Erik Lanza
Product Designer
Product Designer specialising in user focused design, design systems, and visual design
CardioSignal
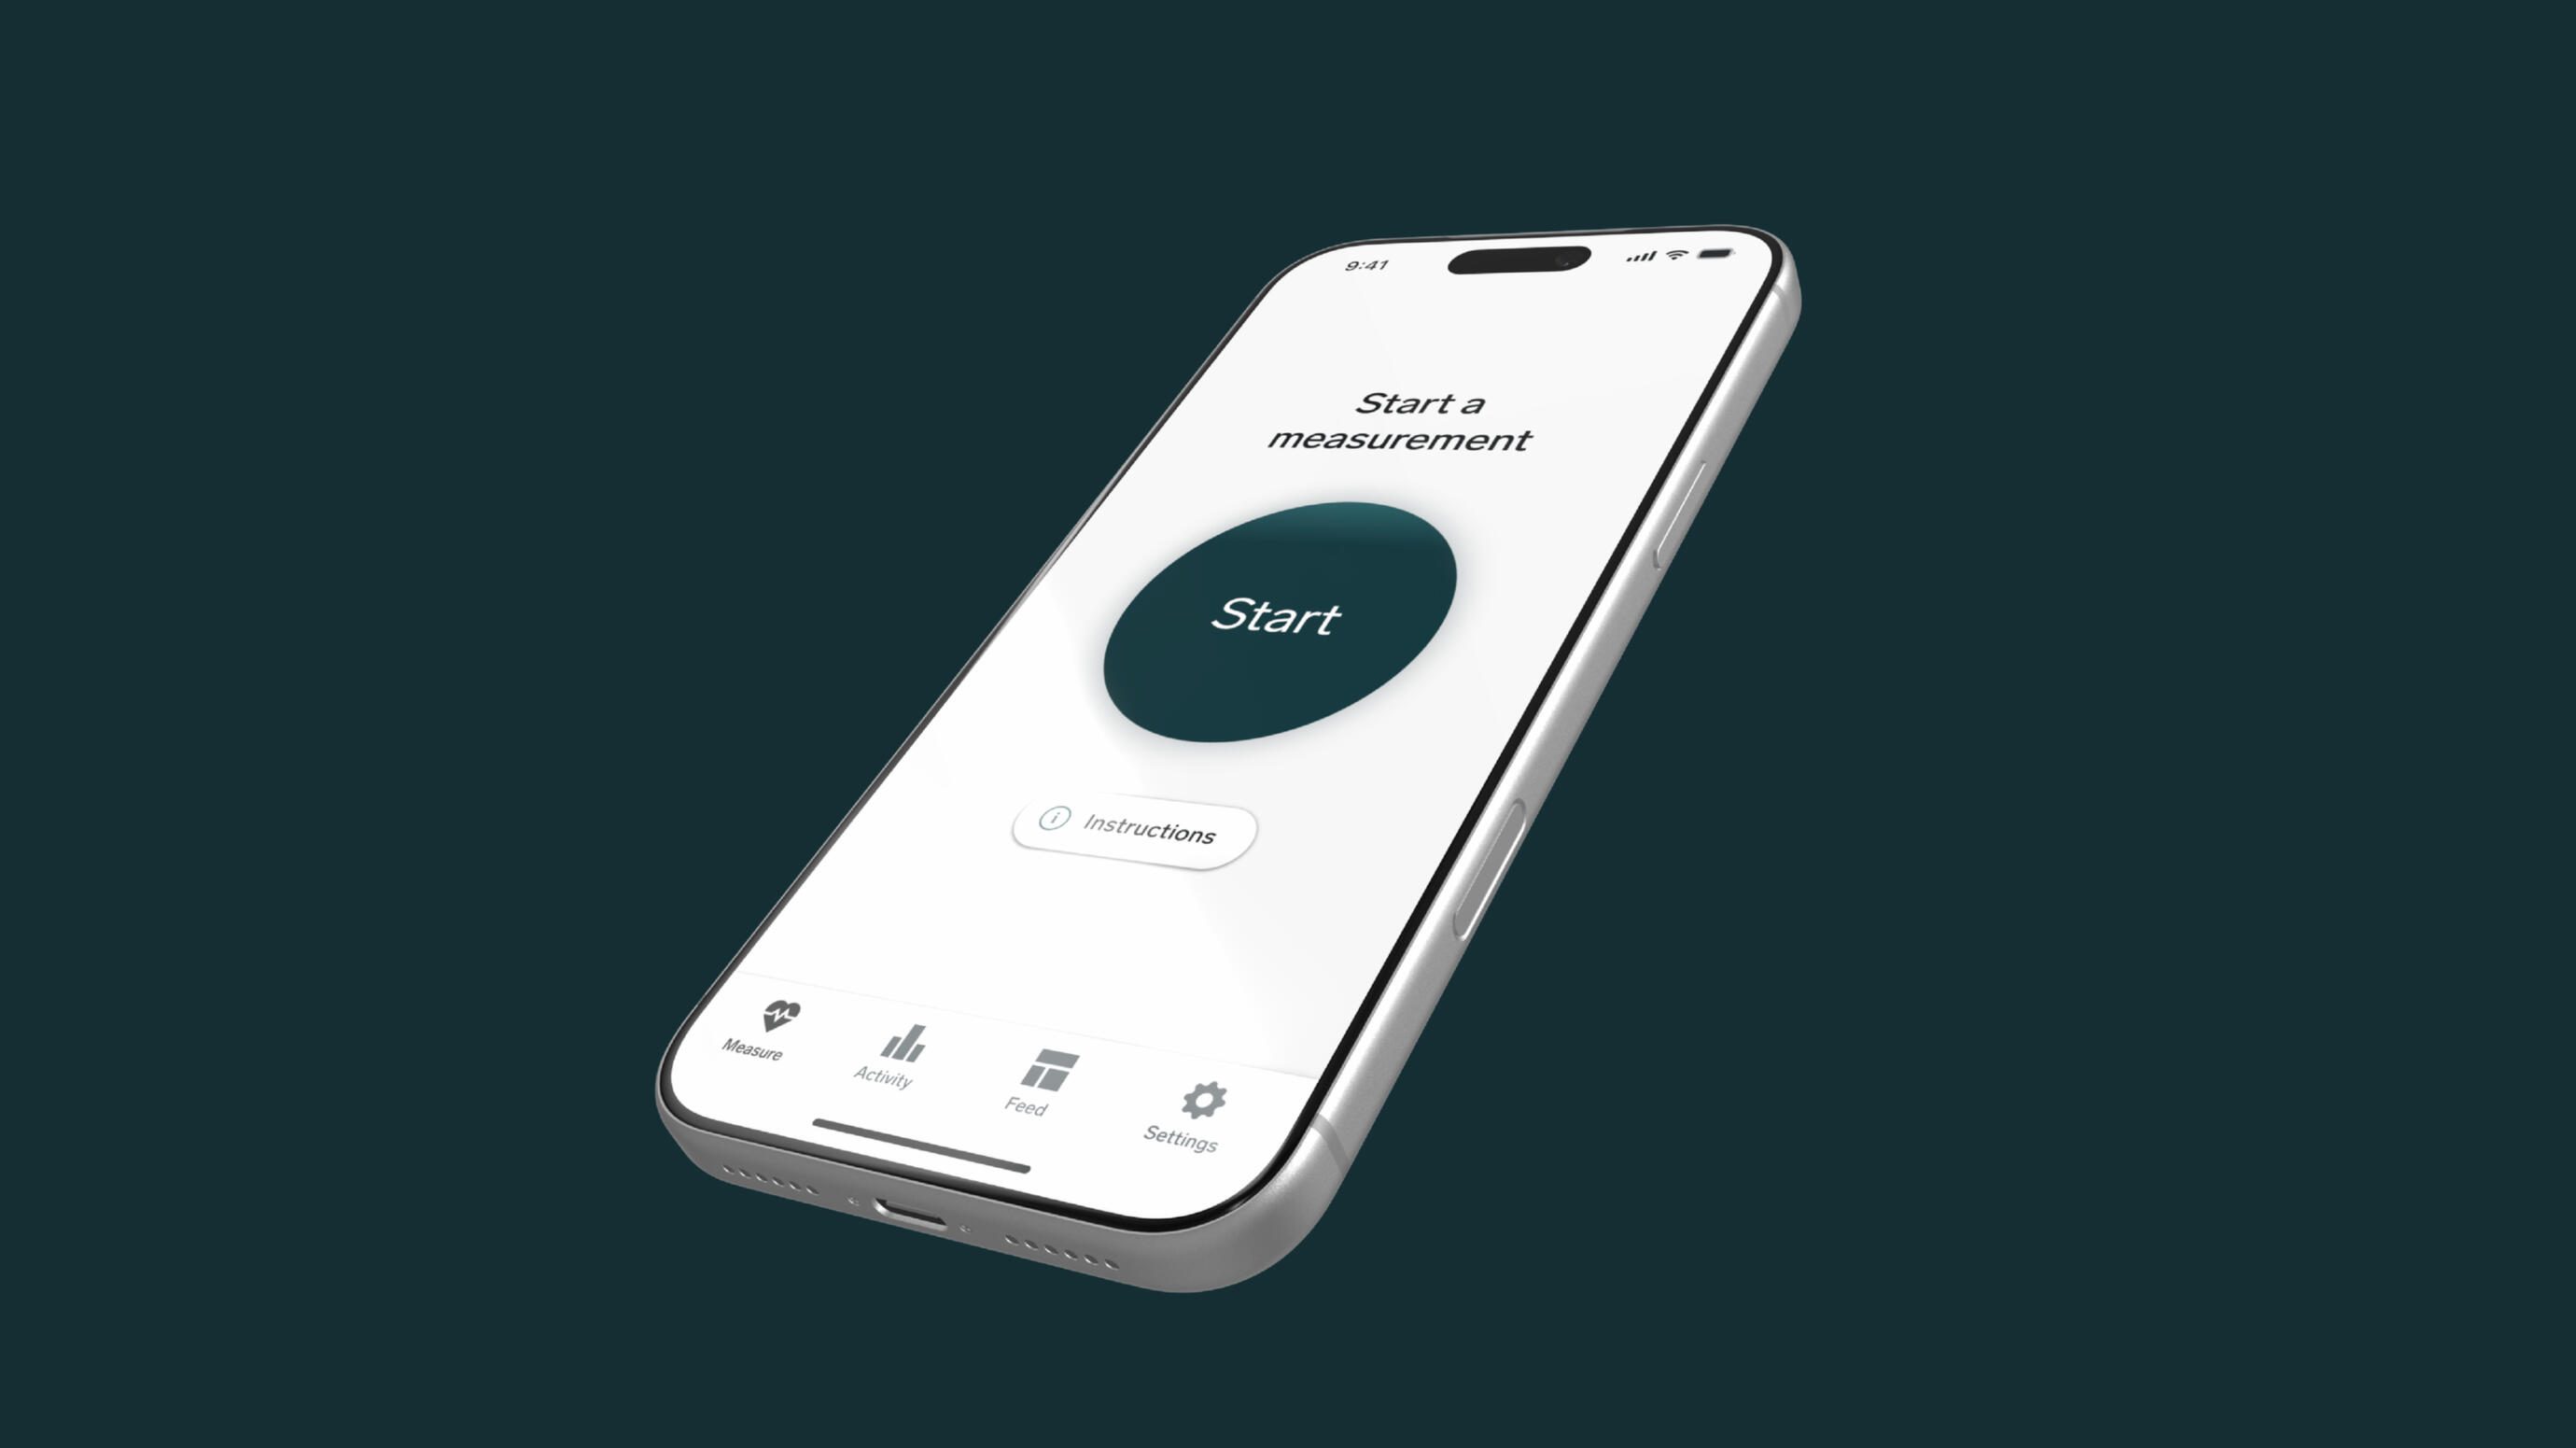
A short look into working for regulated environments. A design system for several product variants.
Design Process
A walkthrough the design process. From a problem to an idea. From idea to requirements, to sketches, to prototypesto an app.
Visual Design
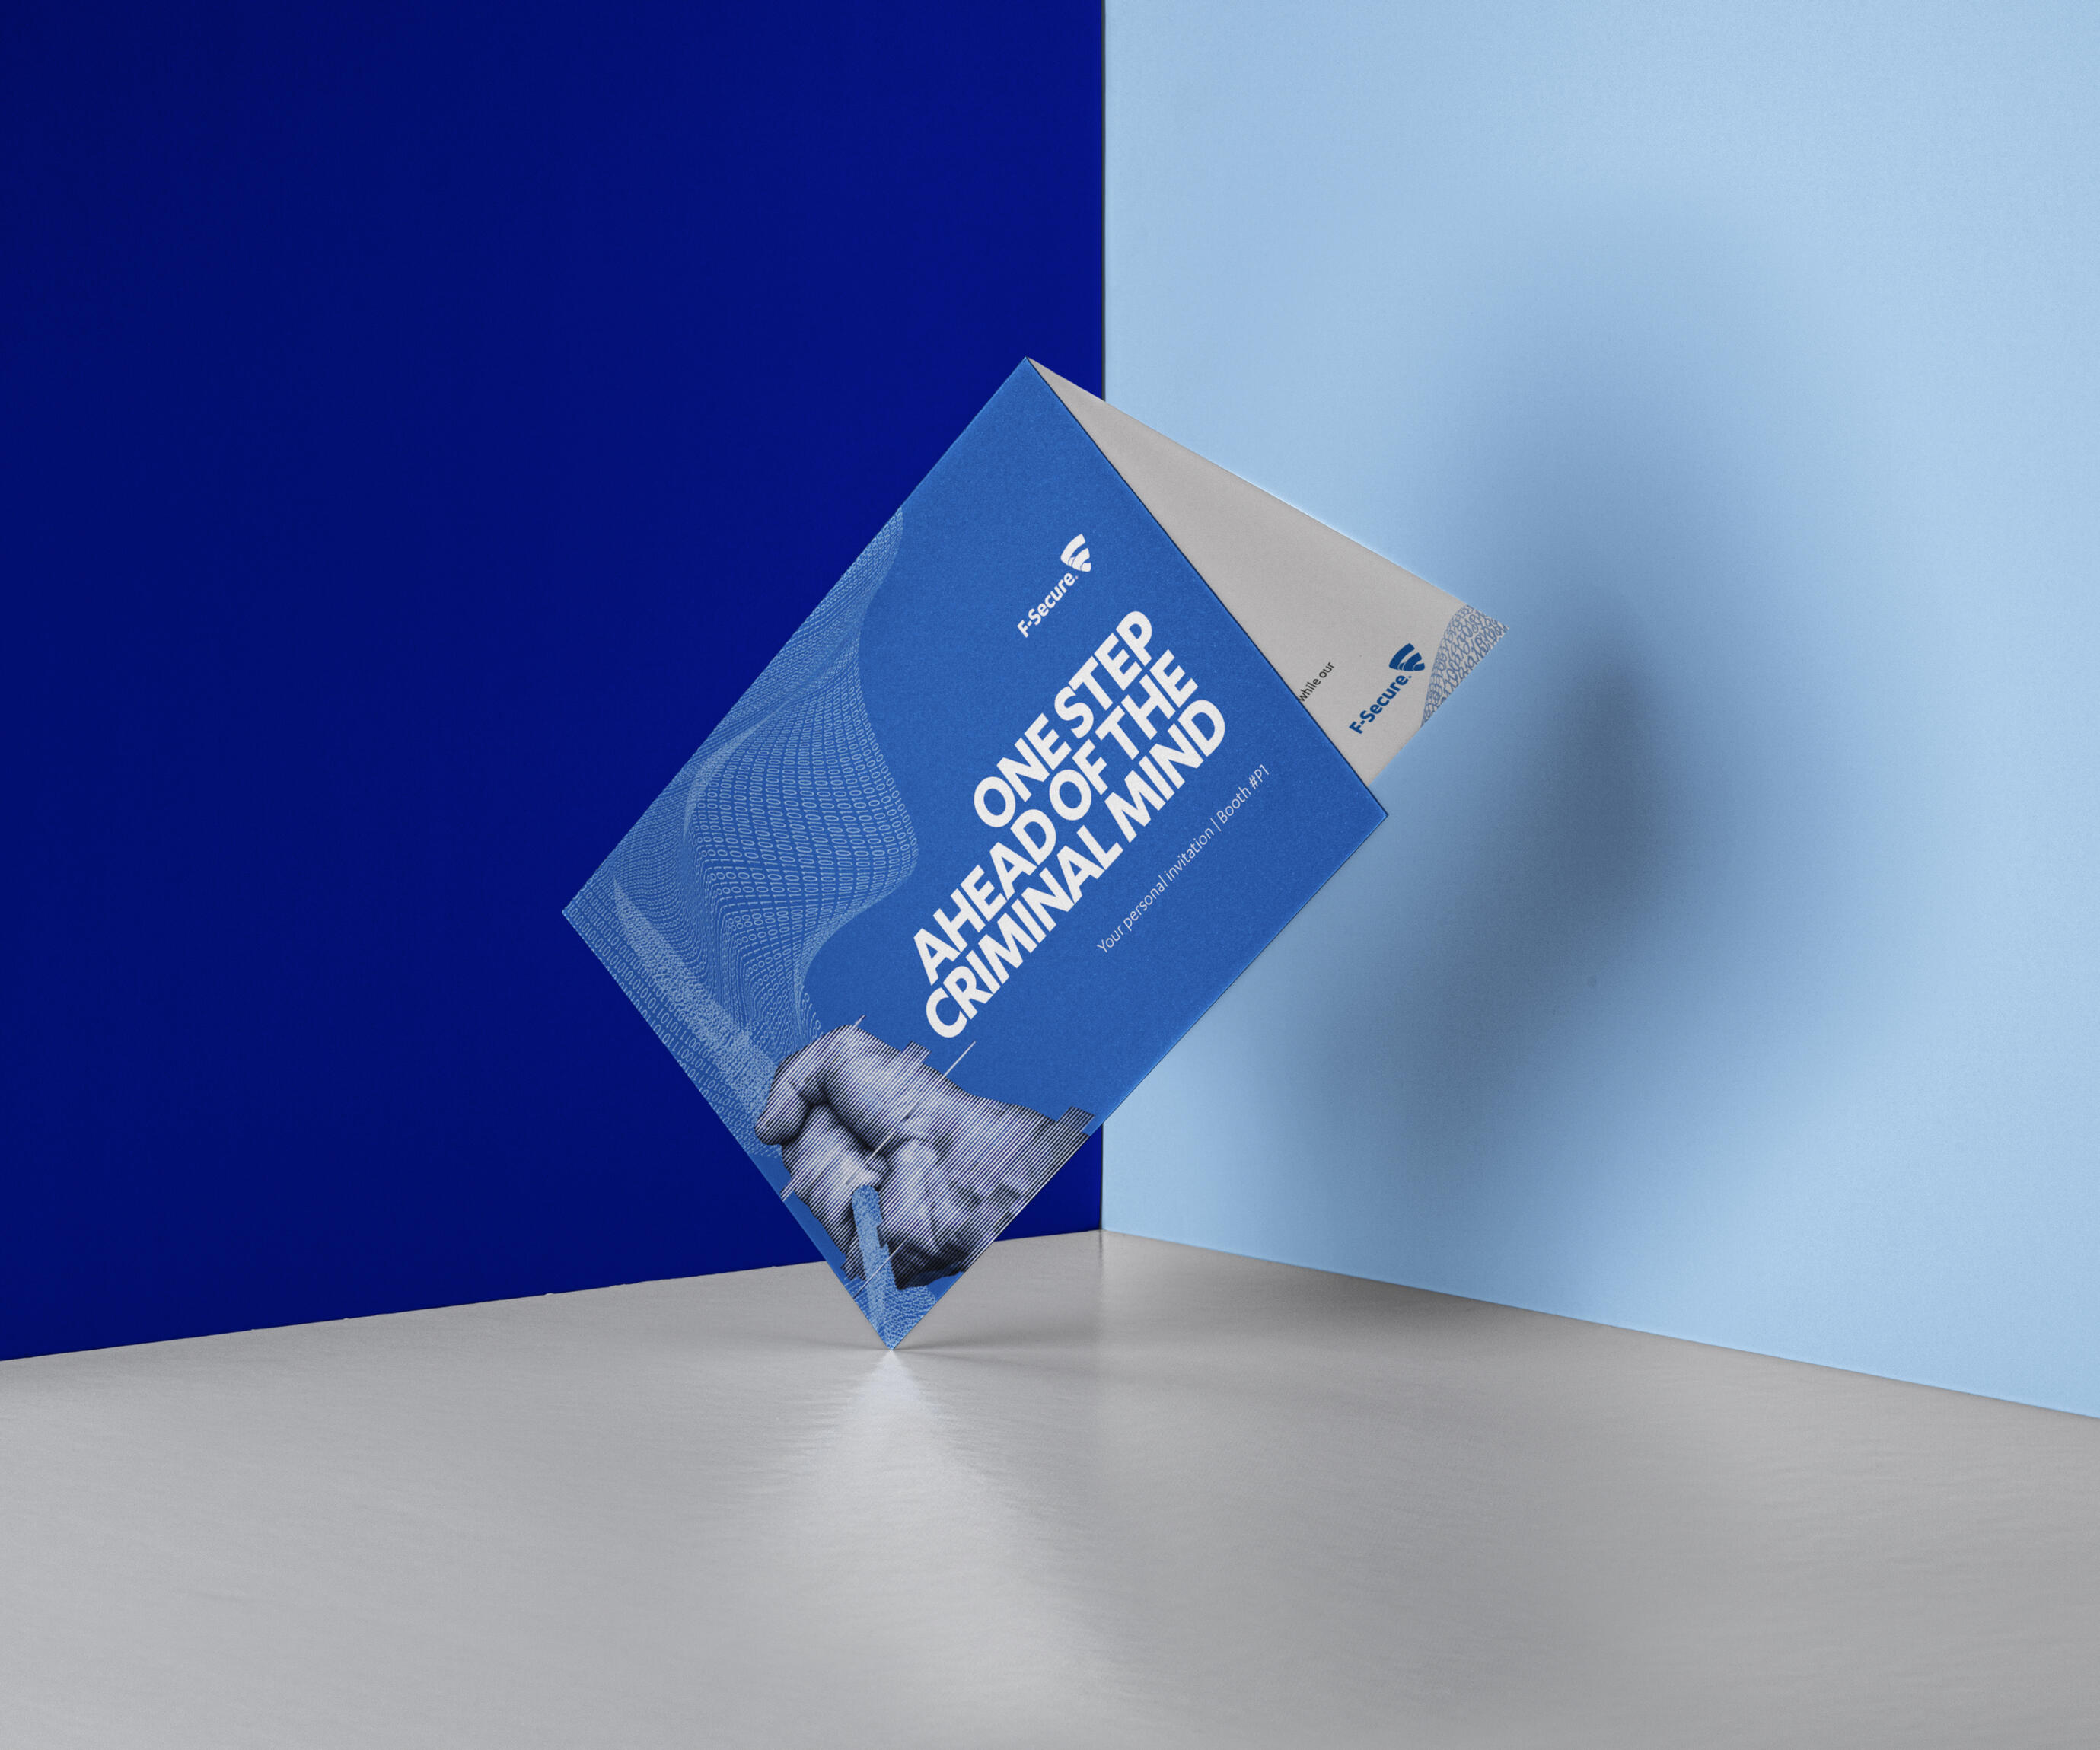
A collection of visual work done for previous employers.
AI-Assisted Case Study
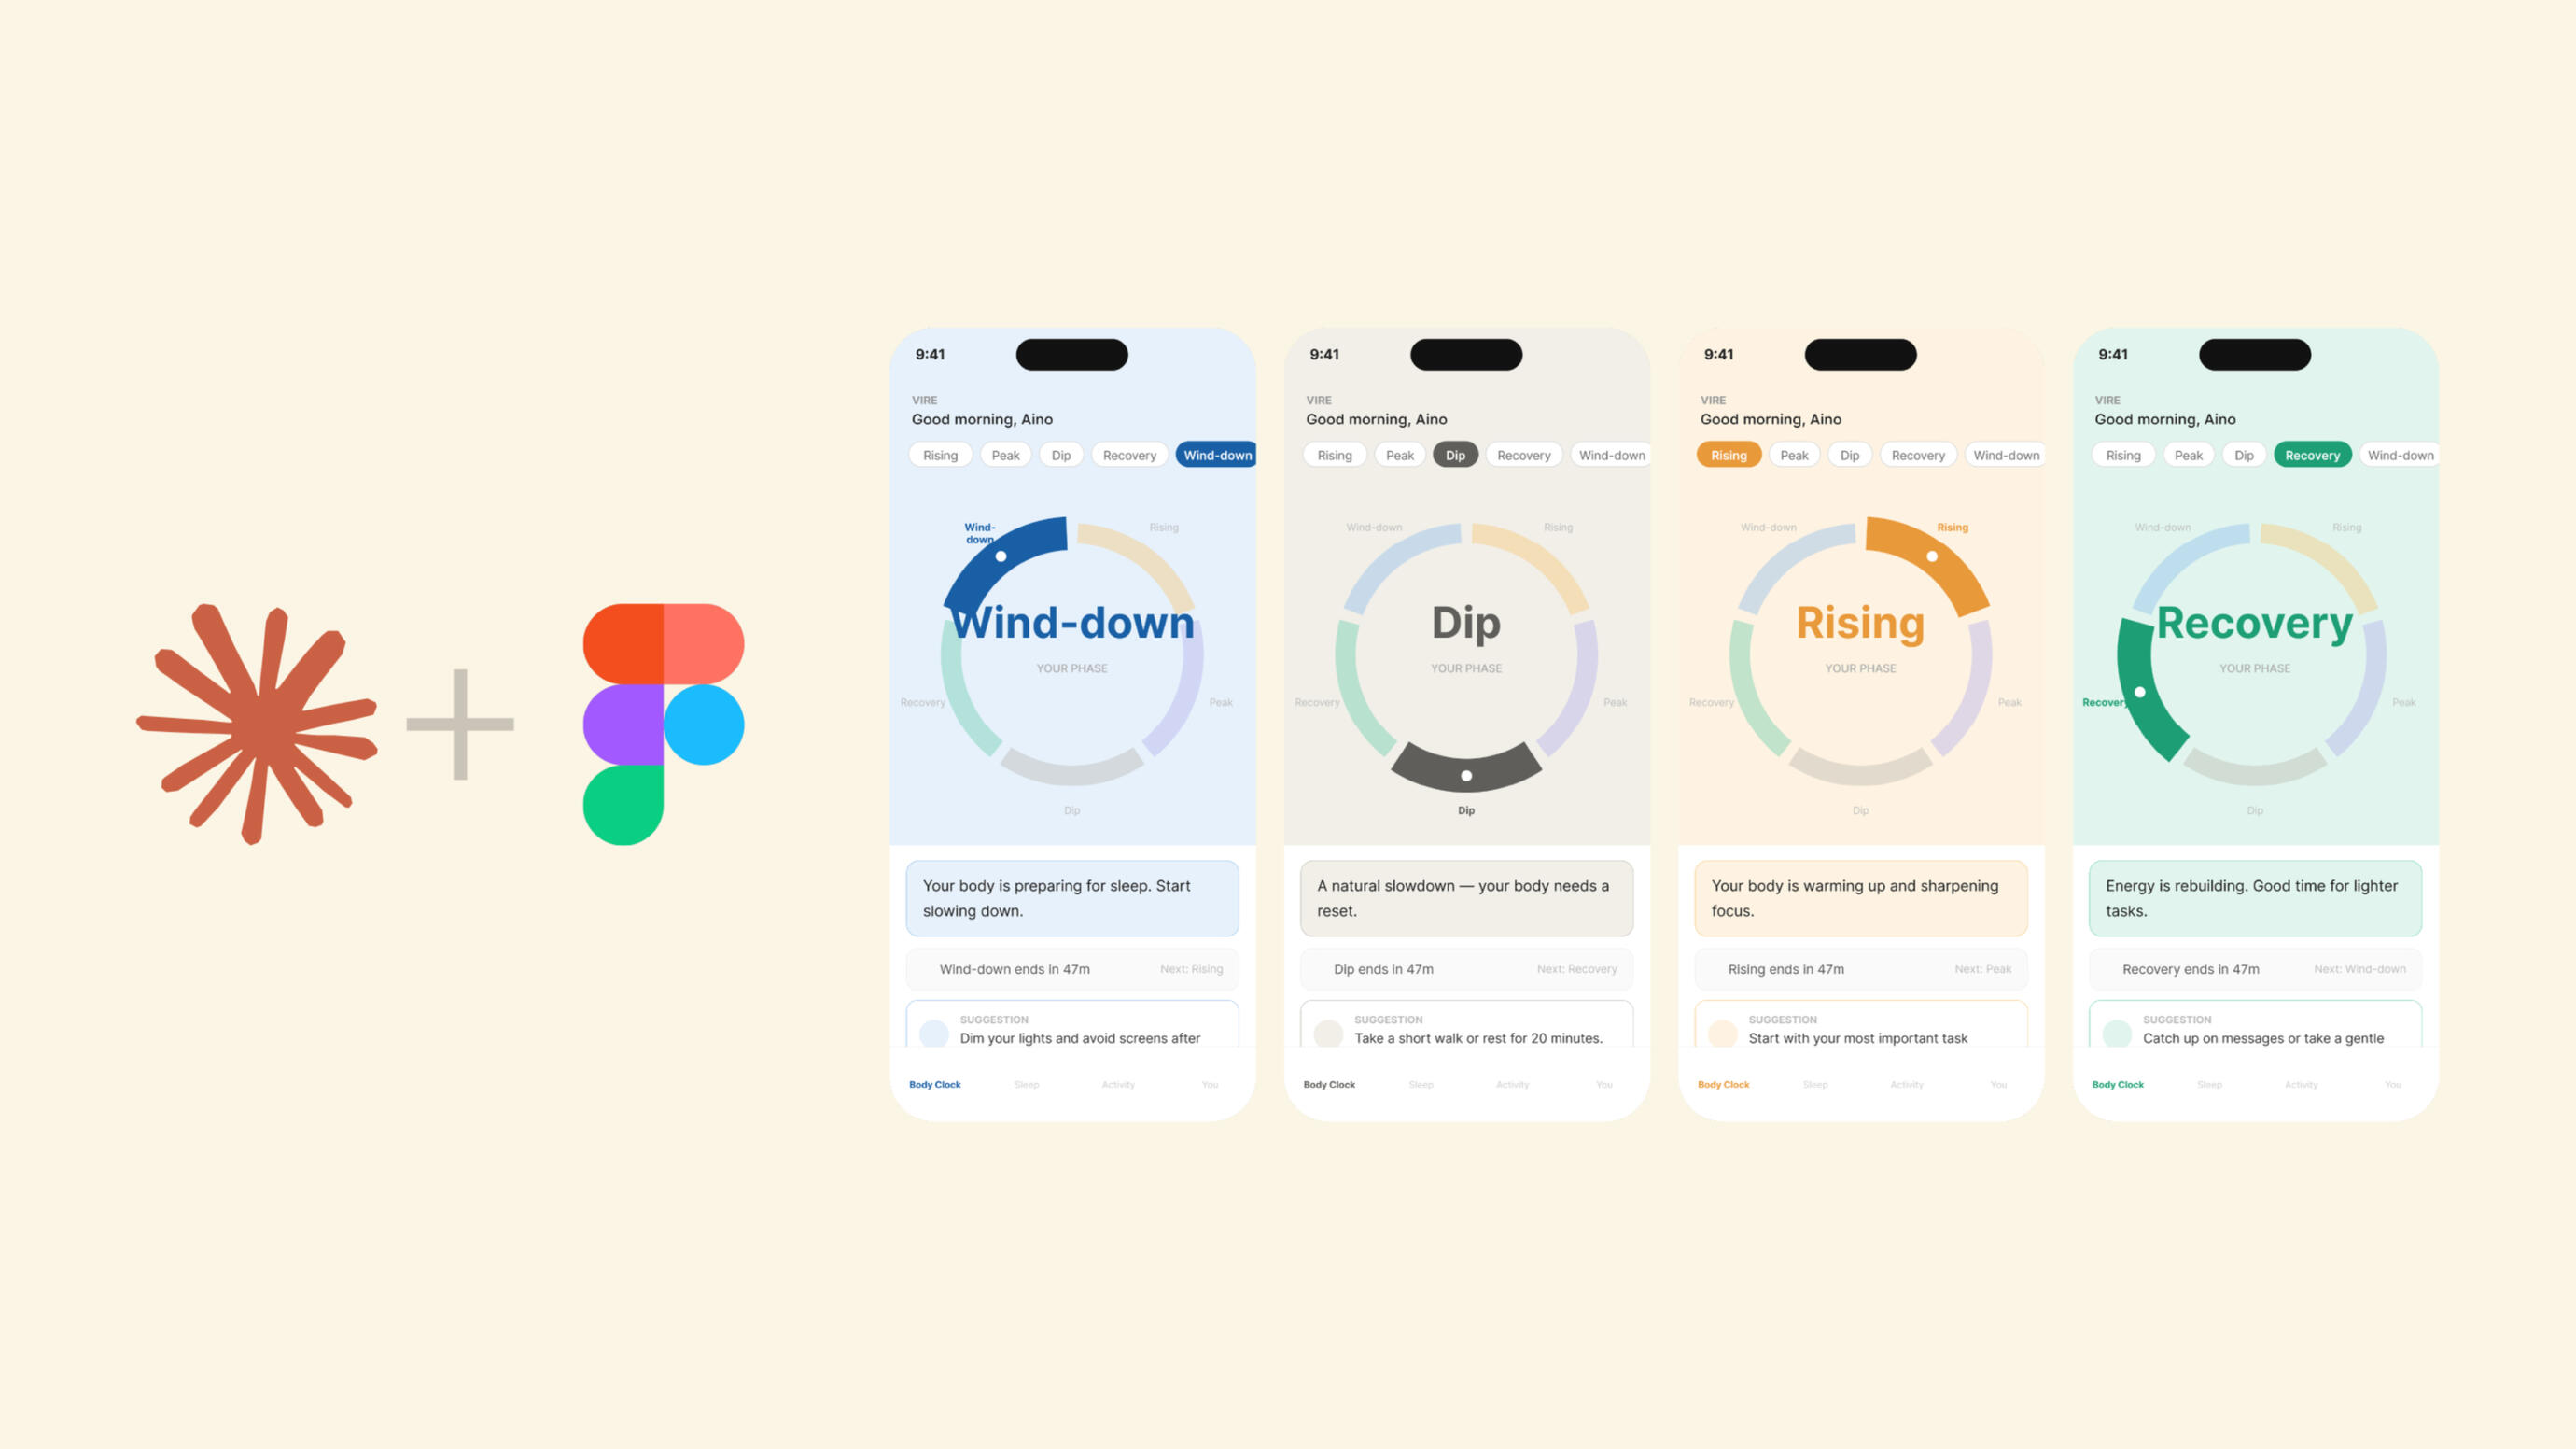
Trying new AI tools
AI-Assisted Study Case
Context
I came across an open product design role at Vire Health, a Finnish health-tech startup building a waist-worn circadian health tracker. I decided to apply and treat the application as a real design exercise.
Could I use AI to move through the all stages of a product design process quickly, rigorously, and in a way that produced work I'd actually stand behind?
Spoiler:
phase i
Discovery: Understanding the product
Synthesising what the product do
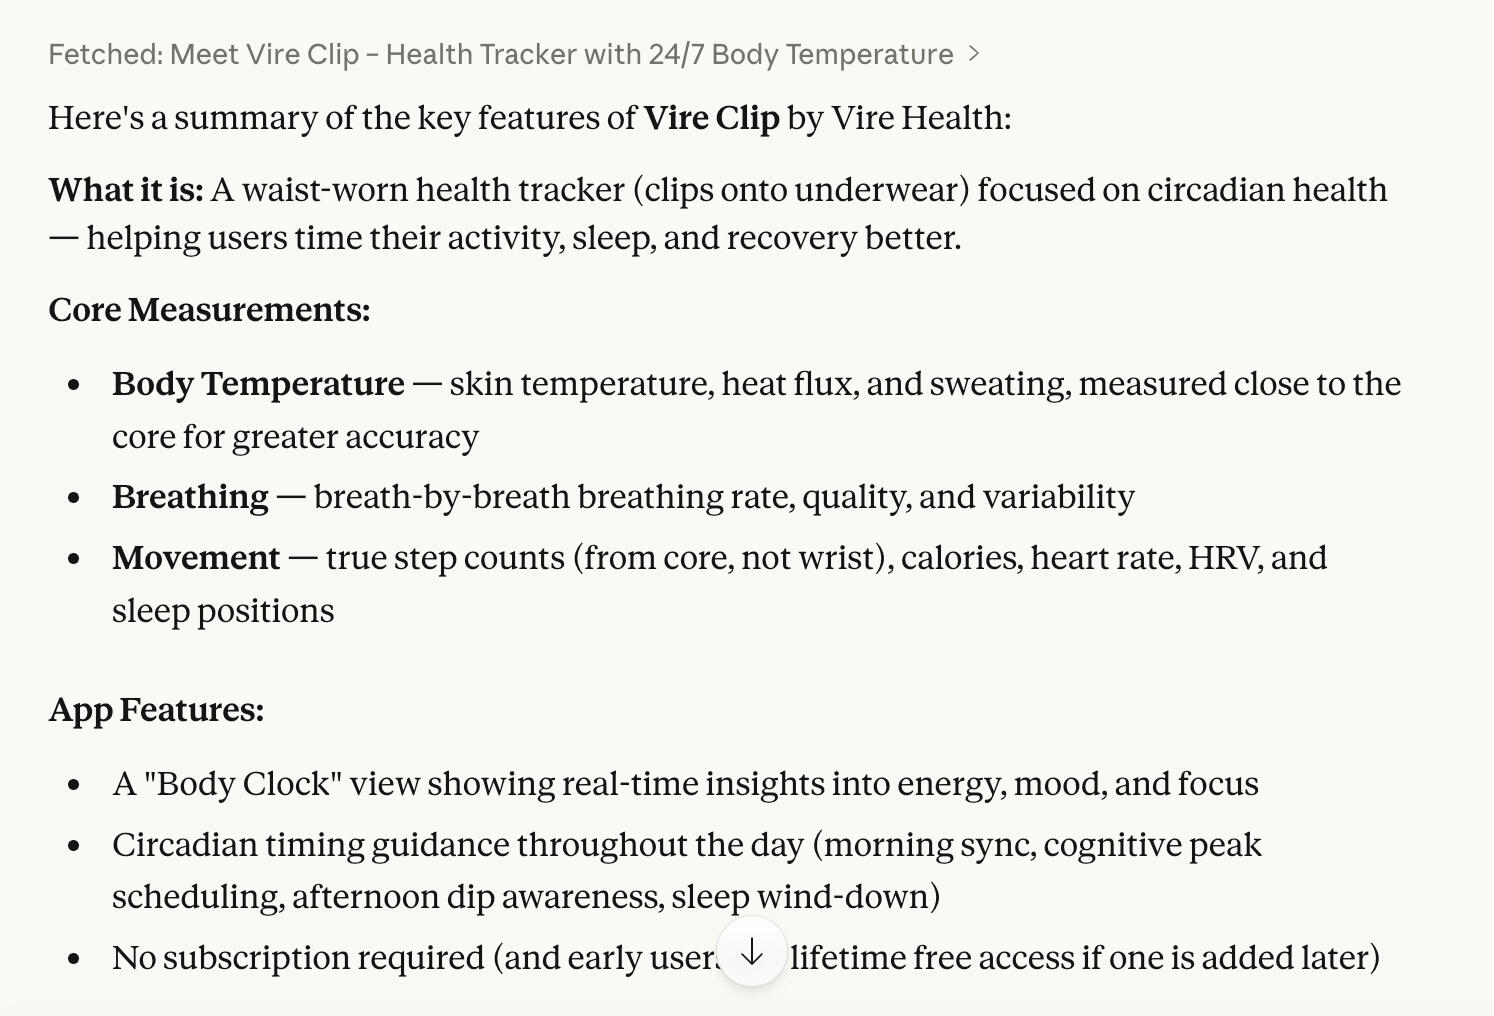
The first step was simple: I asked AI to extract and synthesise the key Vire features from their live product page.

I got a comprehensive result: hardware specs, sensor capabilities, the circadian timing angle, pricing and availability.
phase ii
Definition: Turning insight into product decisions
Building user personas
Now that I understand the product, I can try to understand the users. Based on the product description above, I ask AI for specific, grounded user personas whose needs are rooted in what Vire does.
| Persona | Profile | Core need |
|---|---|---|
| Sofia L. | Senior consultant, frequent traveller | Time her cognitive peak across time zones |
| Mikael K., 42 | Amateur endurance athlete | Optimise training timing and recovery |
| Aino T., 38 | Part-time teacher, managing burnout | Understand her fatigue without decoding data |
| Juhani V., 55 | Biohacker, early adopter | Add core-body sensing to his existing health stack |
| Dr. Rina P., 46 | GP, lifestyle medicine | Recommend a clinically credible tool to patients |
Jobs To Be Done (JTBD)
With the personas in place, the next step is digging into why these users have this need, and JTBD is the right tool for that.
| Persona | JTBD |
|---|---|
| Sofia | "When I land in a new time zone, I want to know exactly when my body will be mentally sharp, so I can schedule my client meeting at the right time." |
| Aino | "When I open the app in the morning, I want a simple, human explanation of how last night went, so I don't have to decode charts or remember what HRV means." |
The JTBD pointed clearly in one direction. For the scope of this case study, I'll focus on the Body Clock view.
phase iii
Ideate: Generating solutions
AI-assisted quick prototyping
To explore solutions, I used AI to first to generate a Product Requirement Document (PRD) from the information gathered previously. Then used that PRD as the blueprint for building a working prototype using AI.
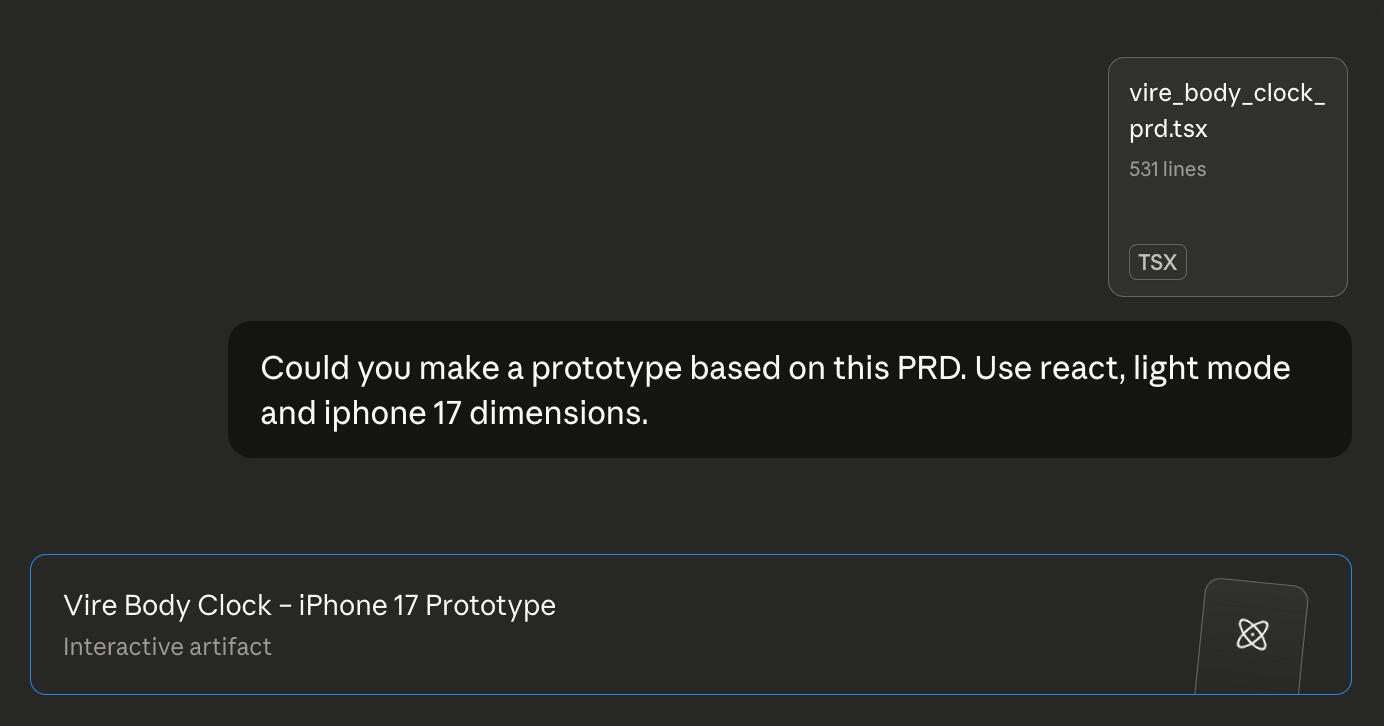
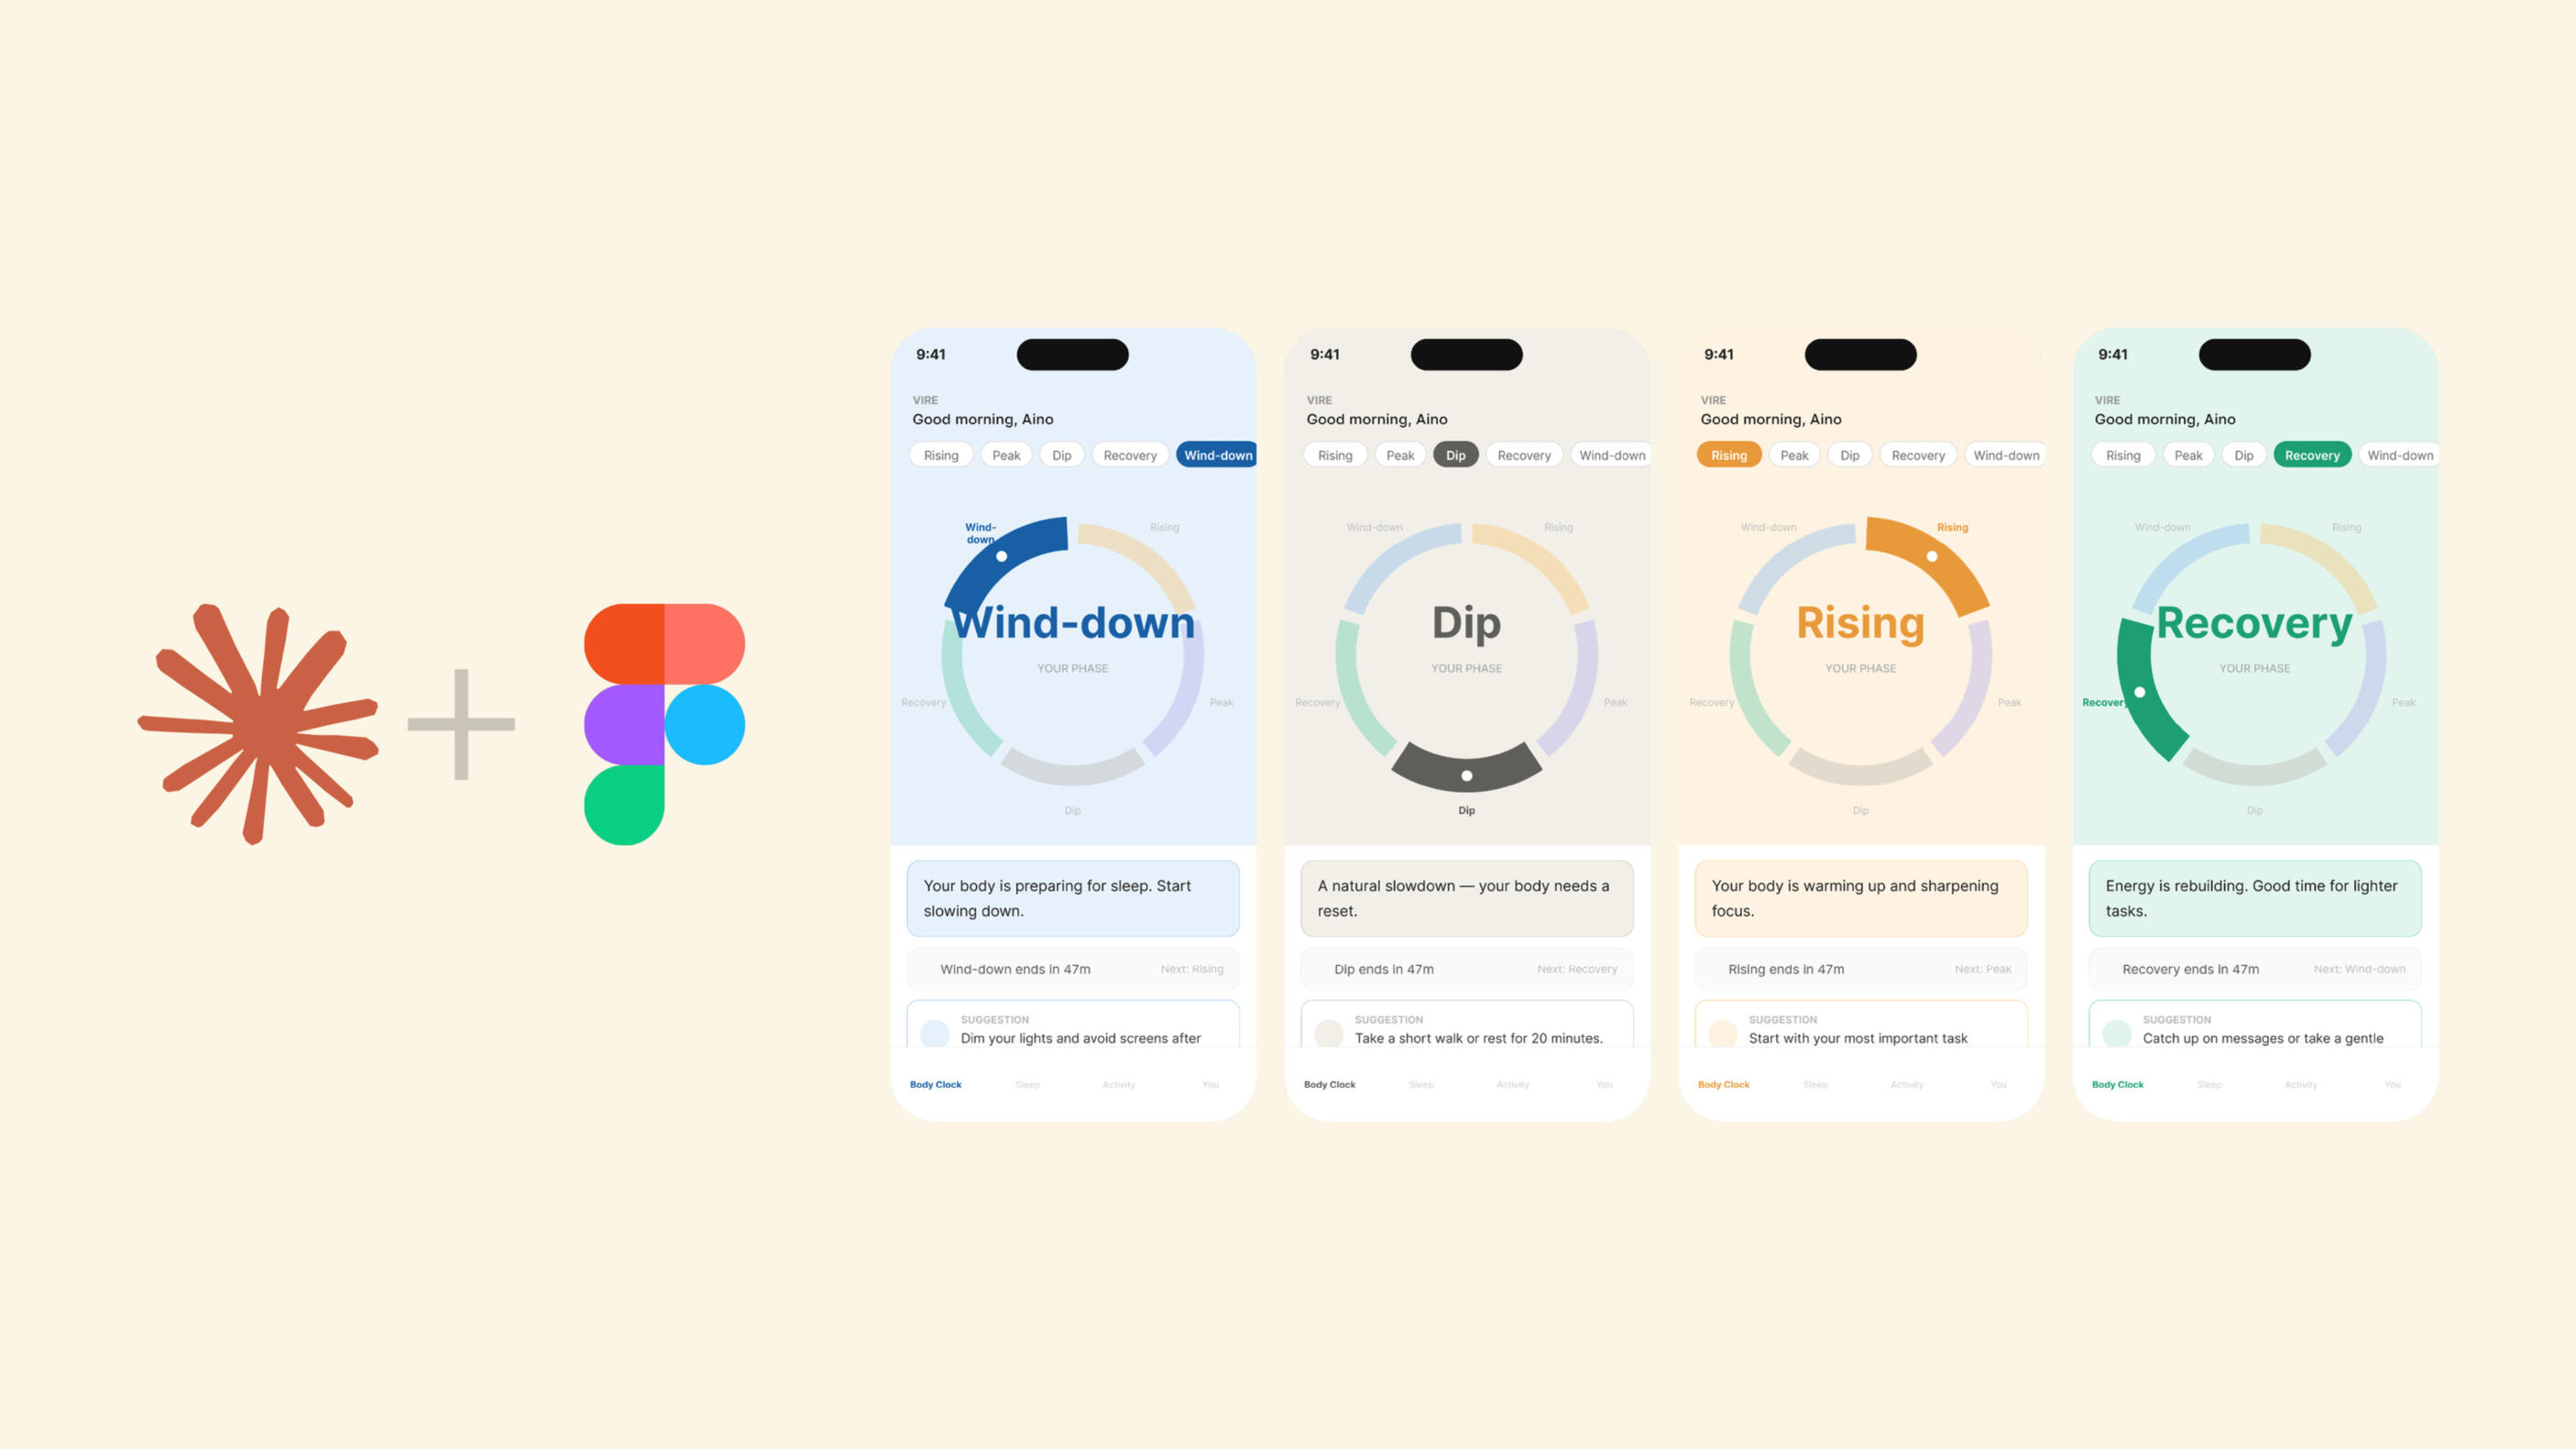
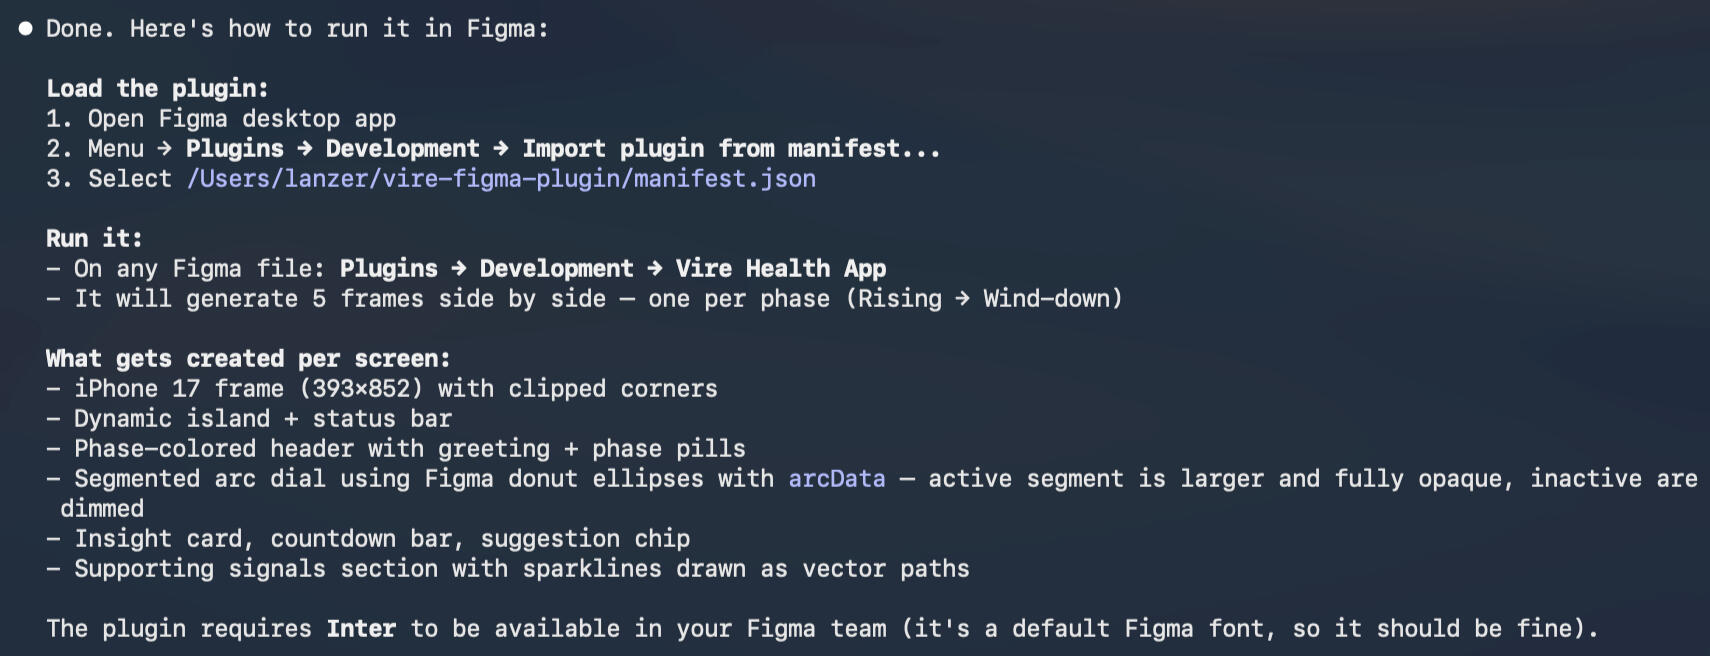
The prototype could be tweaked and improved using AI. I will go on a controversial route and use Figma's MCP server and the AI-generated prototype code to create a script I can import to Figma and generate design frames and layers.
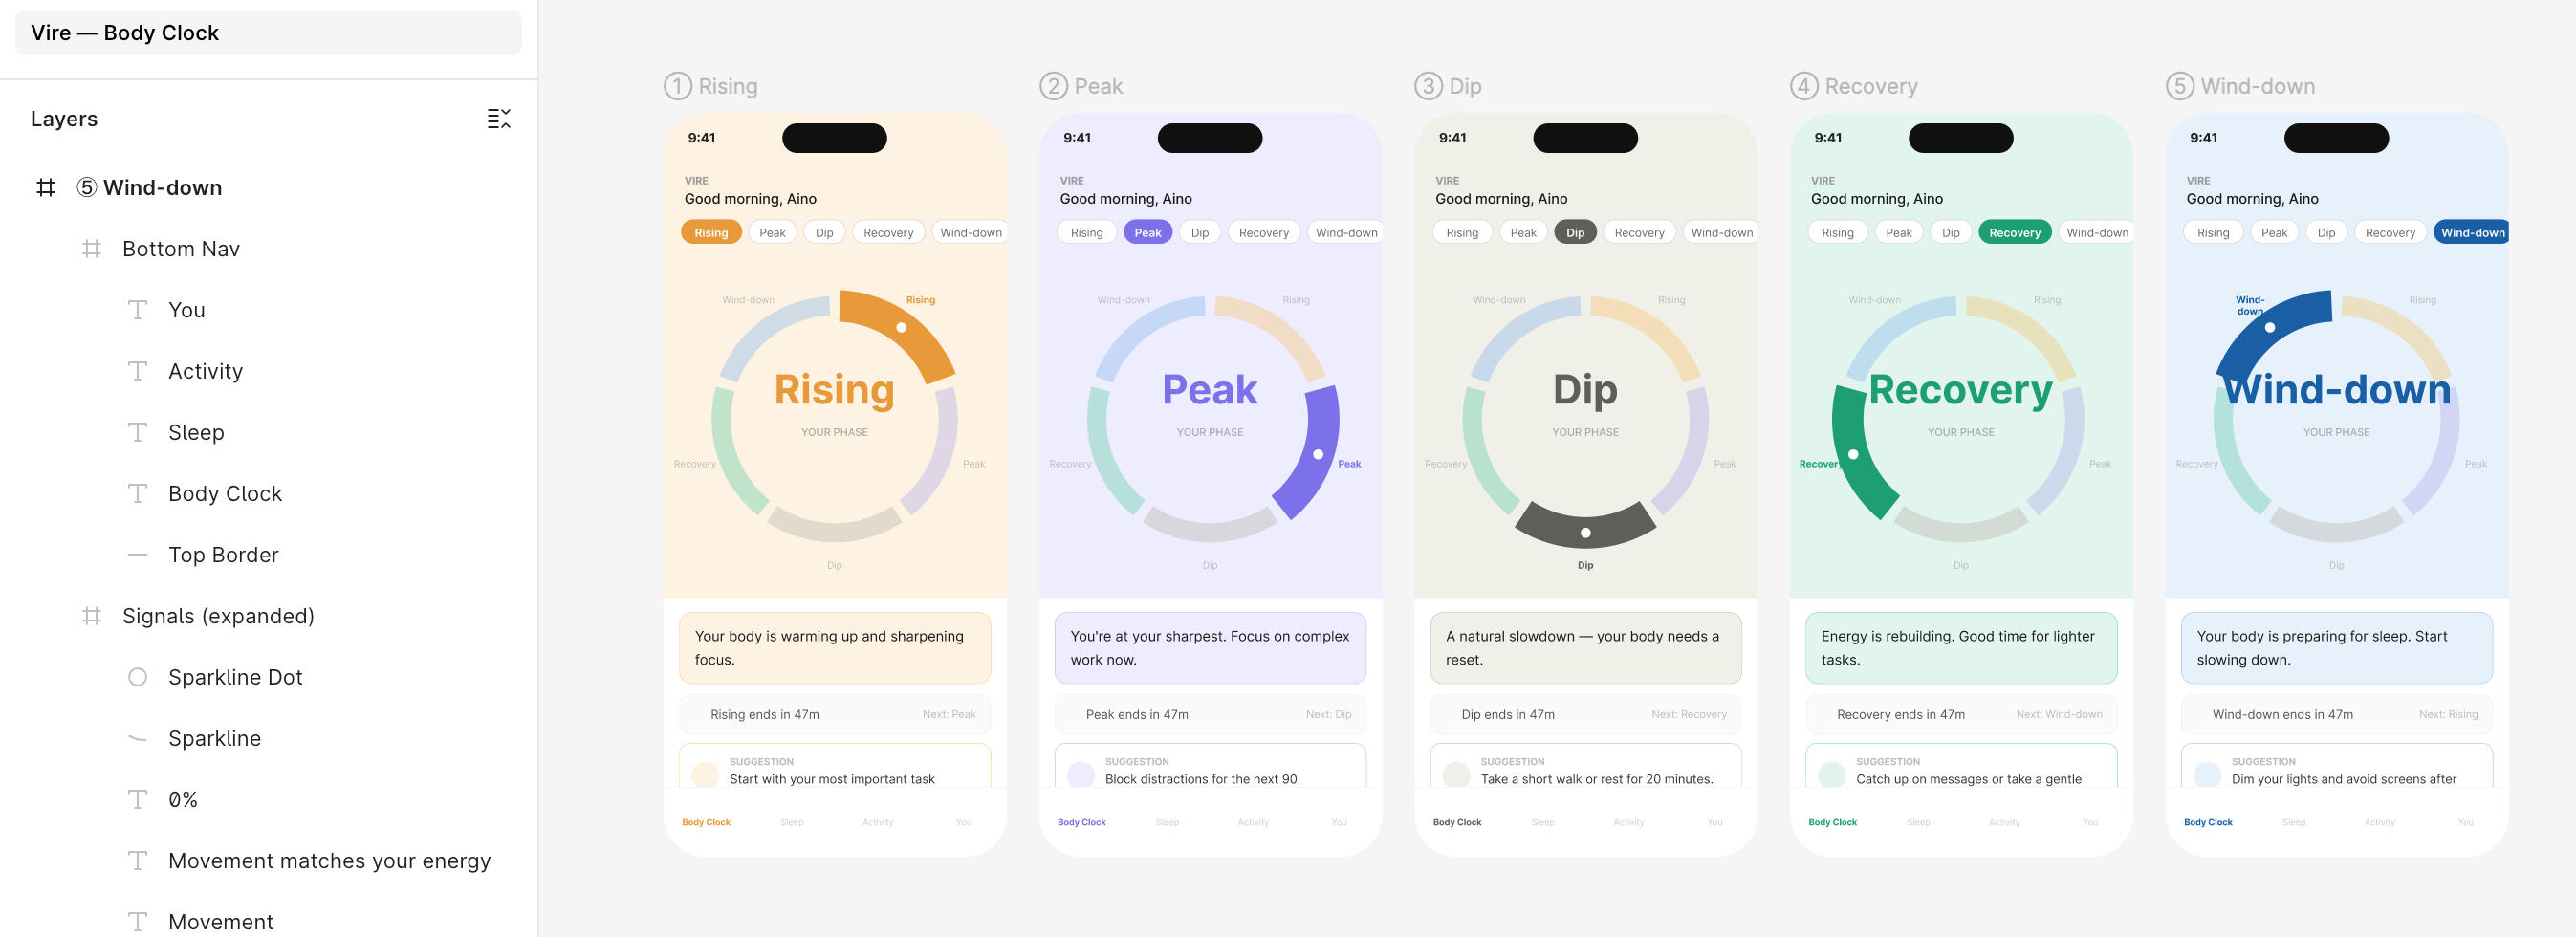
Now I import the script to a Figma file and voilà, we have an arrangement of Figma design layers.
In conclusion
For this case study, the answer to "Could I use AI to move through the all stages of a product design process quickly, rigorously, and in a way that produced work I'd actually stand behind?" is Yes and no. Fast and exploratory? Absolutely. Rigorous? Not on its own. AI can move you through the process quickly and open up options you might not have considered, but it can't replace the humans you're designing for. The resulting design isn't usable as-is, but it's a jumping-off point.
CardioSignal
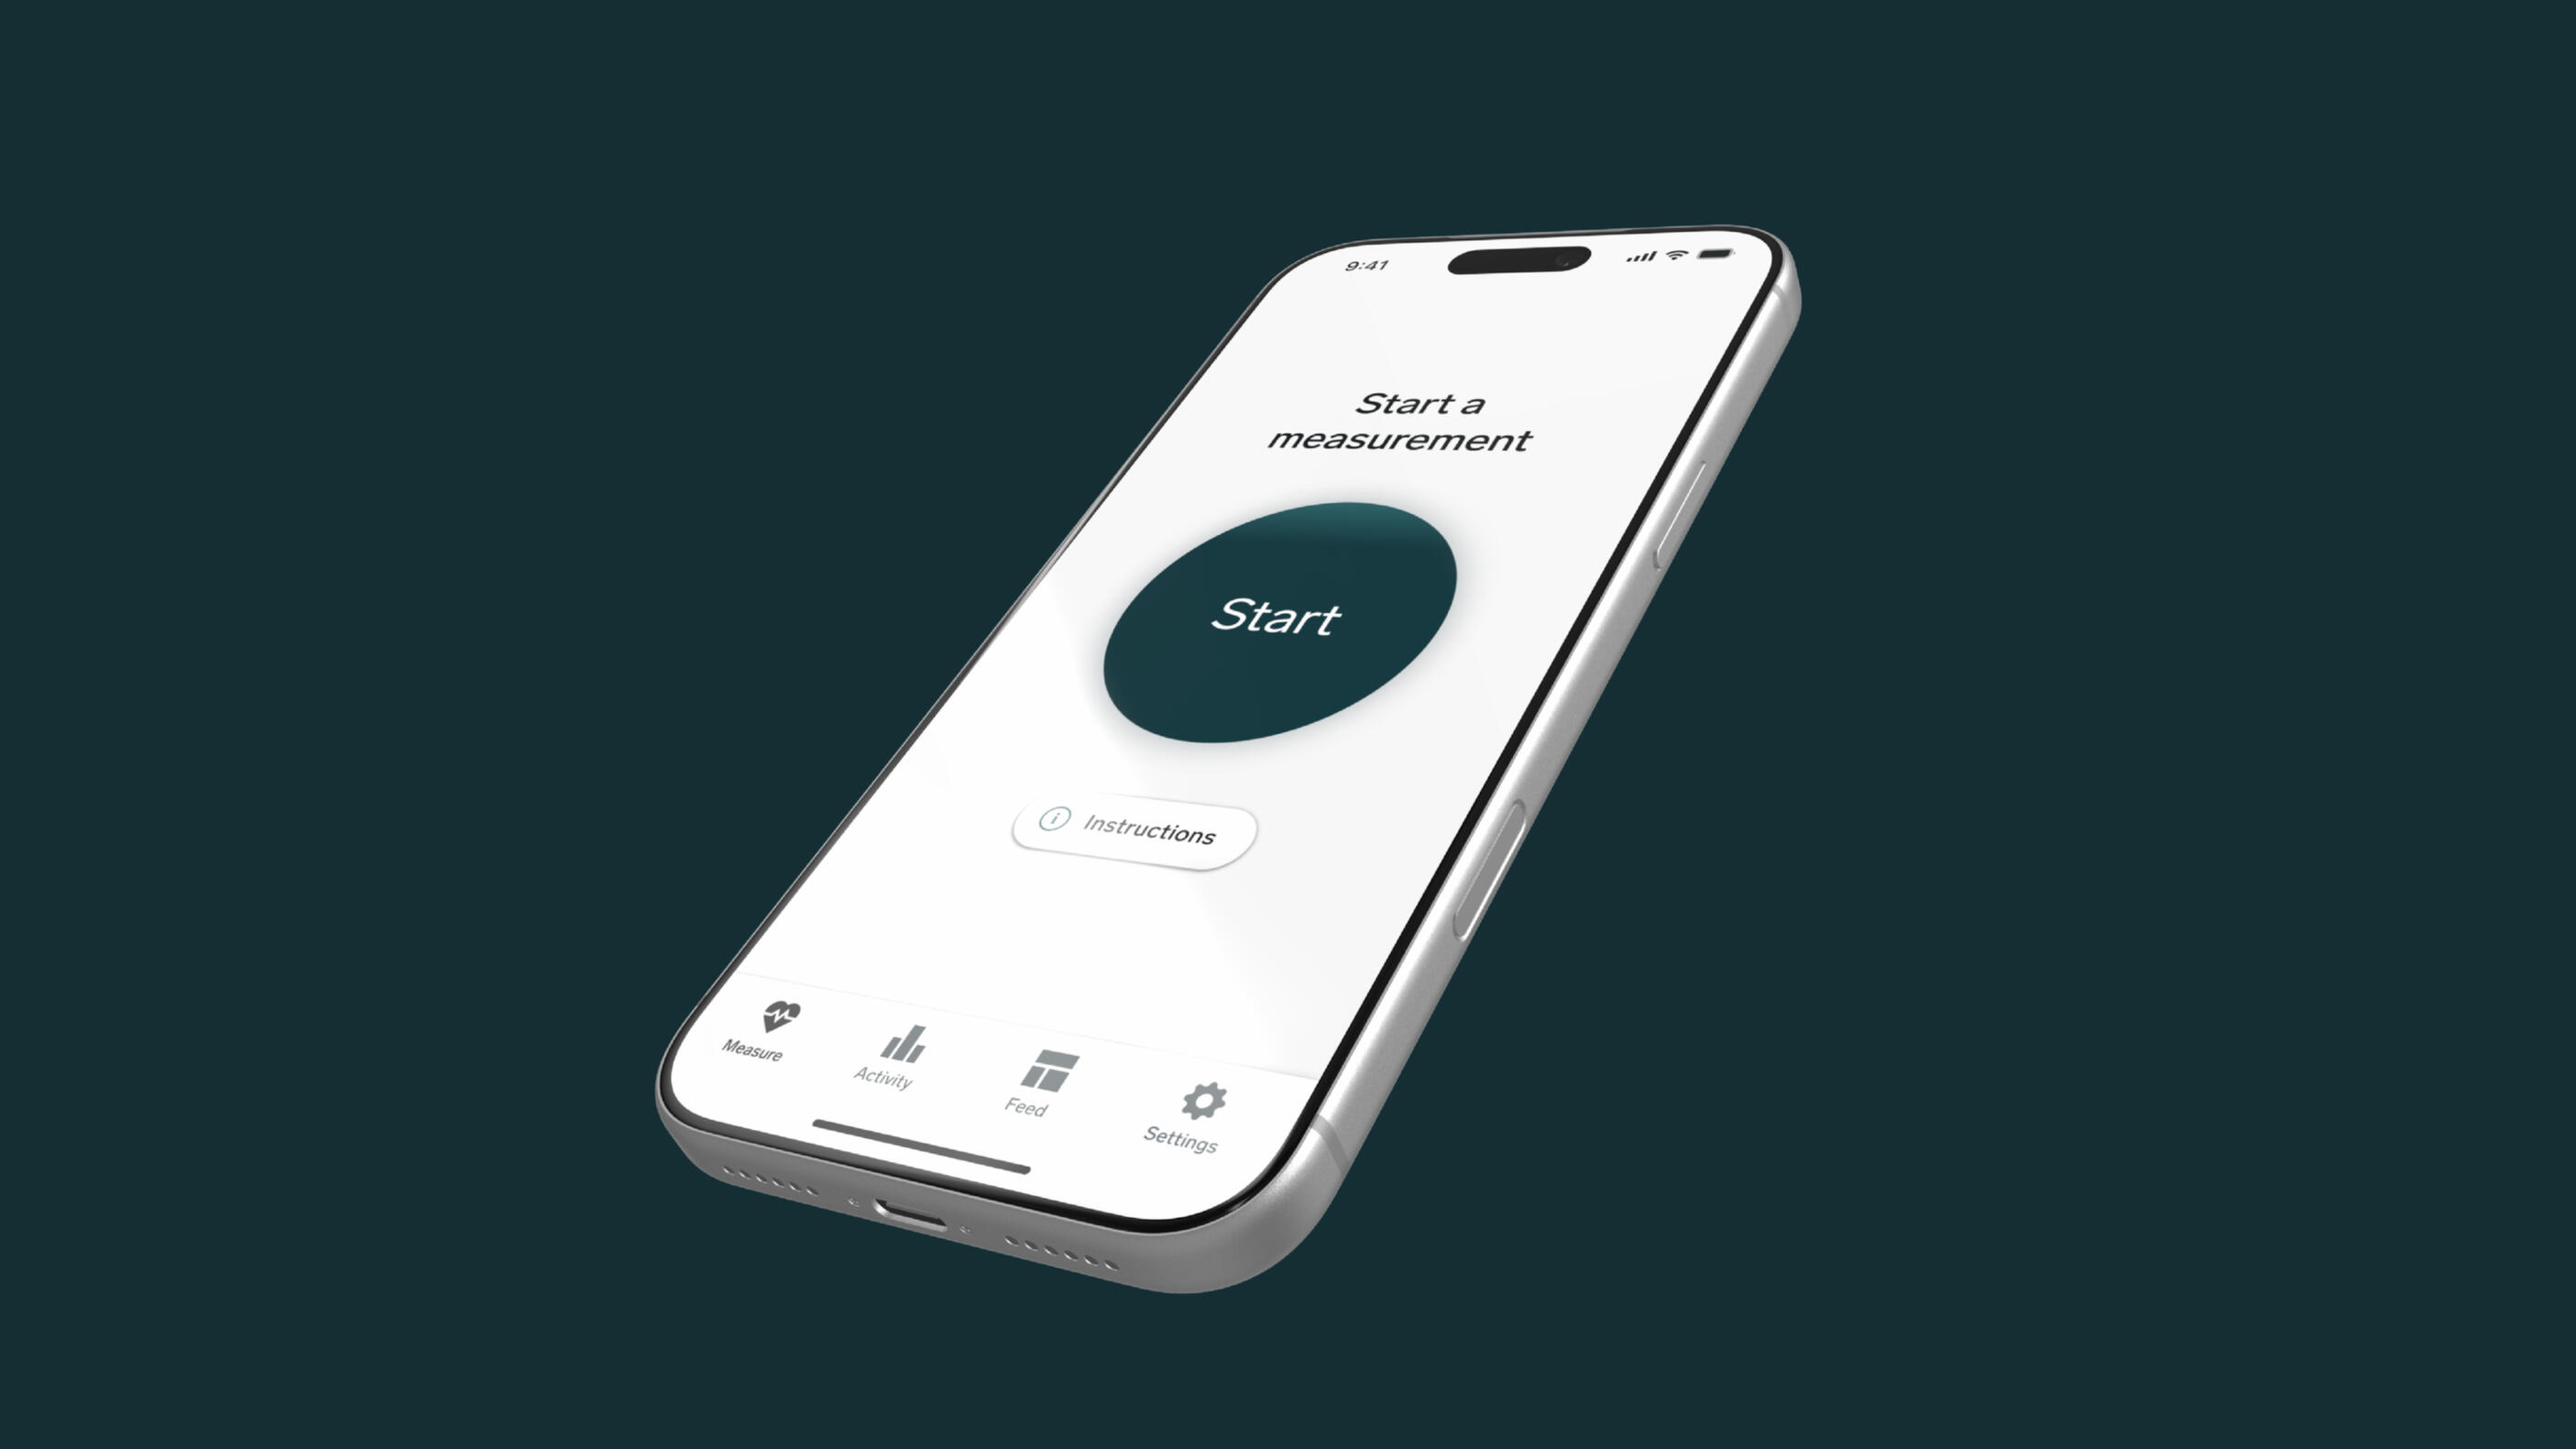
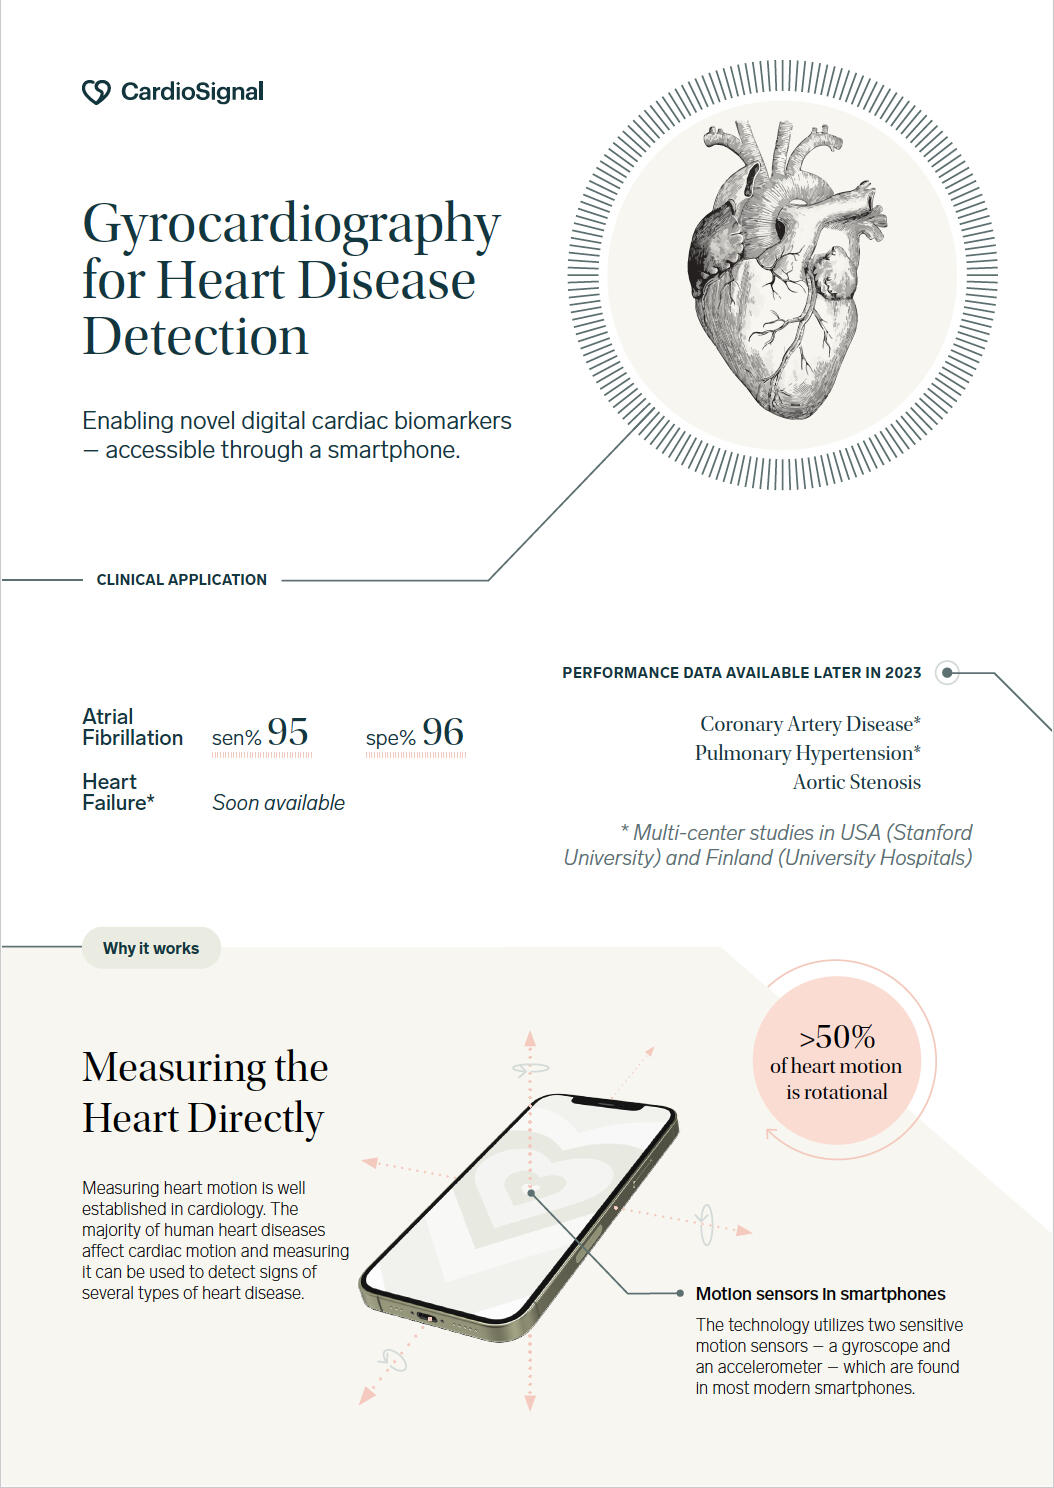
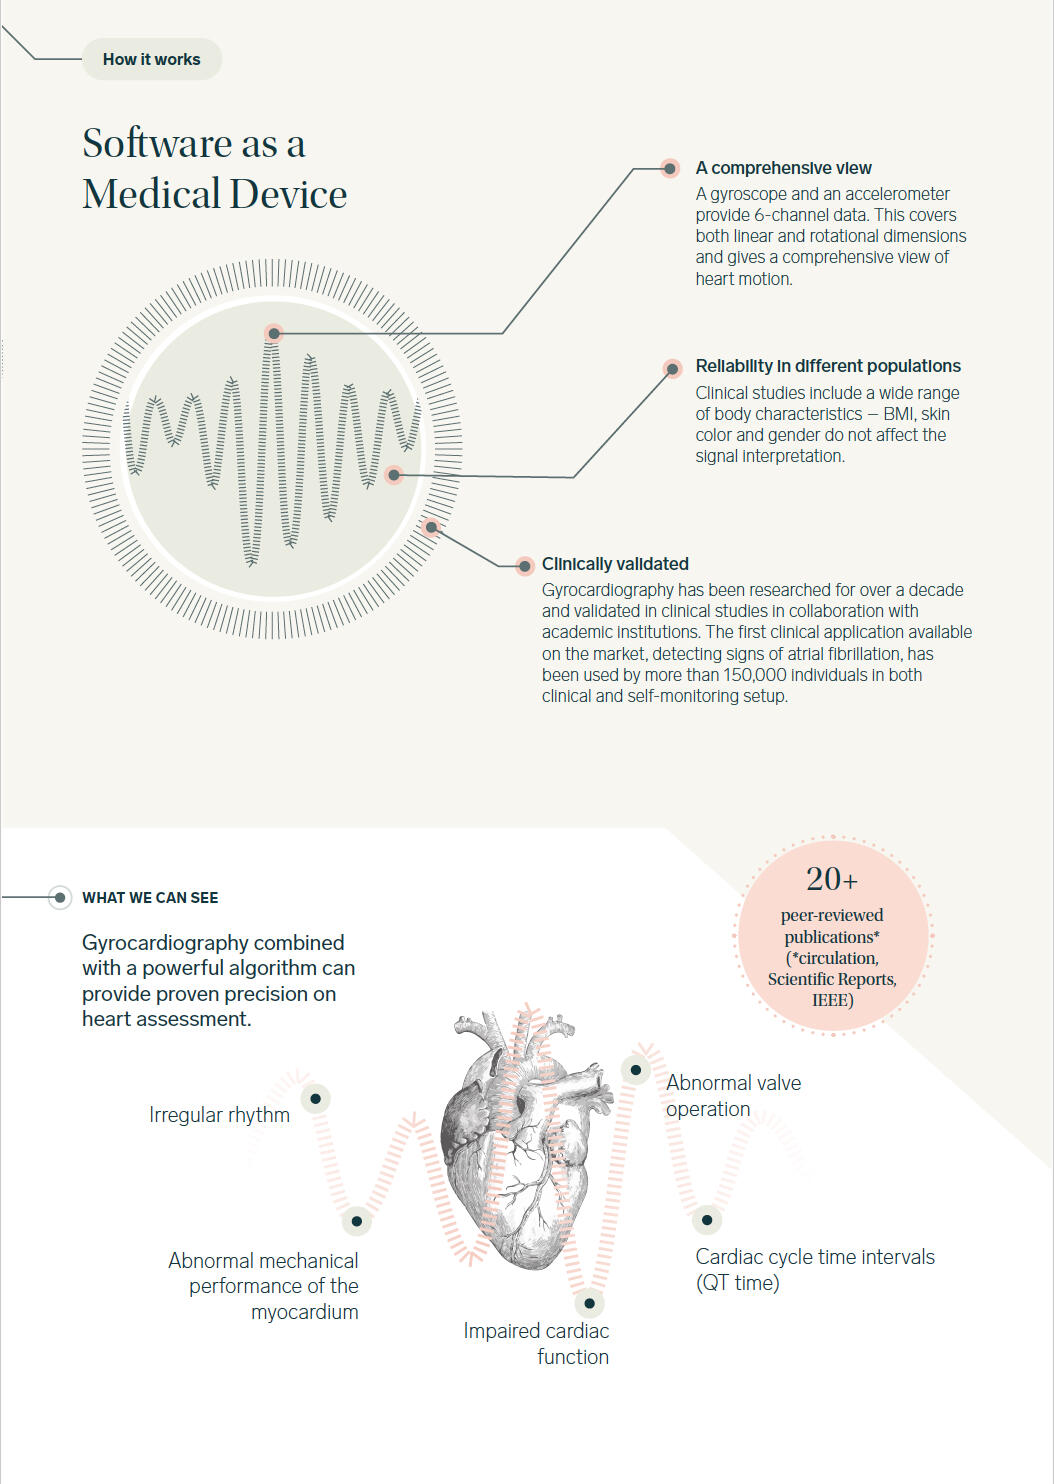
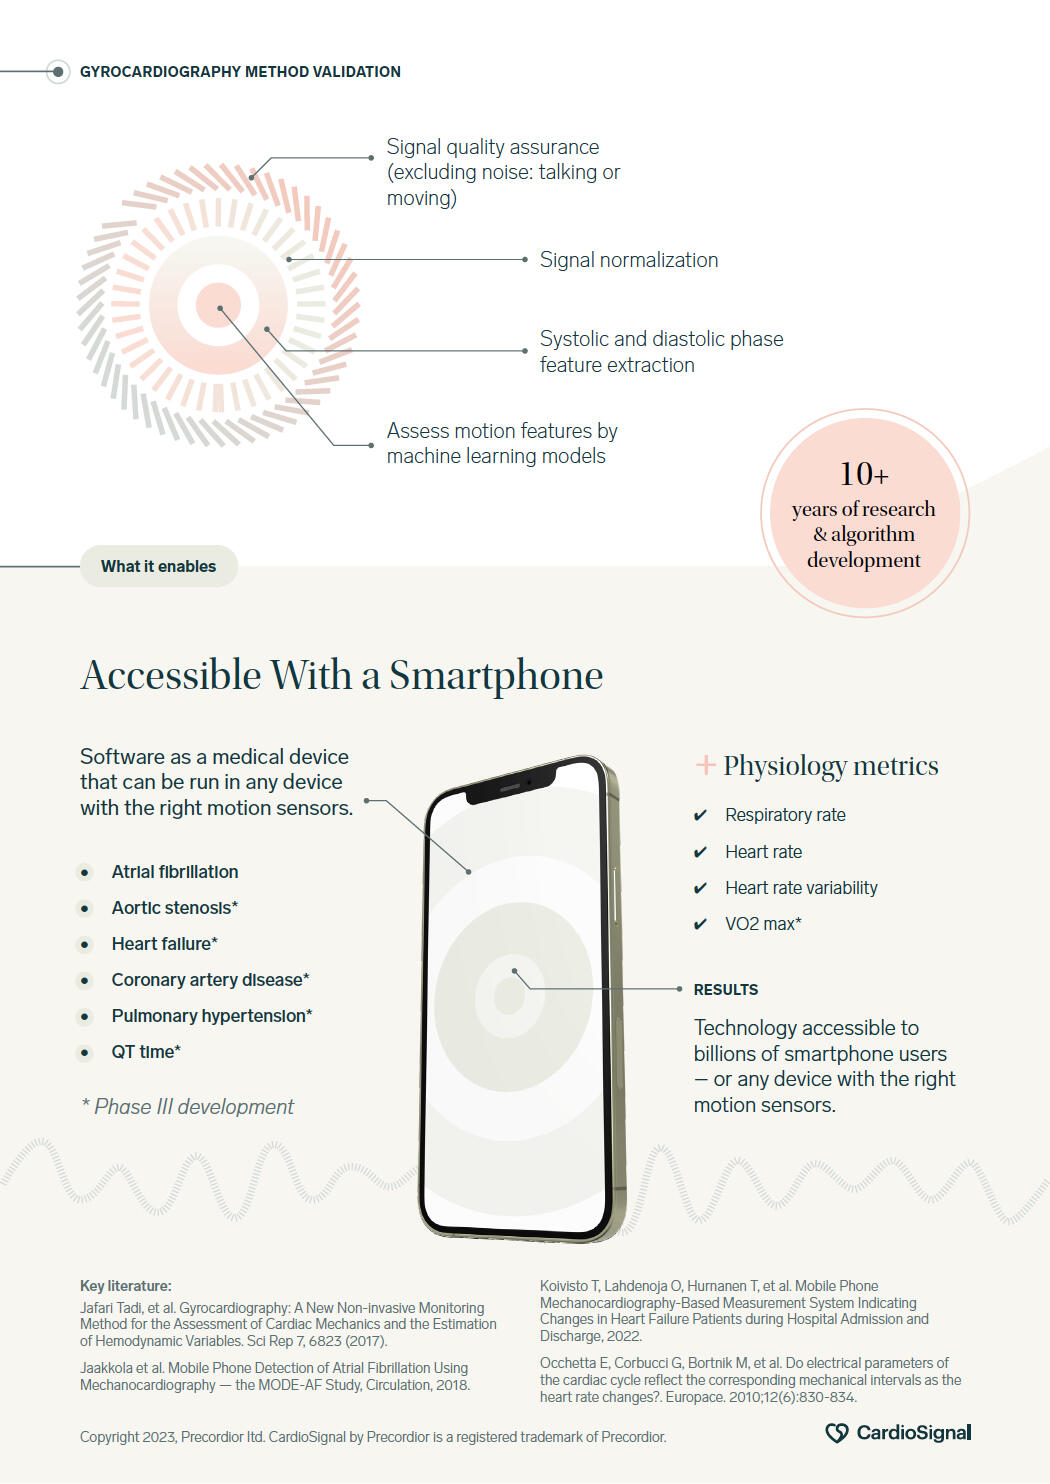
CardioSignal is a regulated mobile health product designed to detect cardiac irregularities through short measurement sessions. As a medical device software product, it must comply with IEC 62366-1 usability engineering standards, requiring rigorous validation, documentation, and risk mitigation before release.
challenge i
Lack of design thinking
Design and development teams were working with little to no communication. This created a lot of confusion, lack of proper documentation and inconsistencies throughout the app design. There was no proper design files or versions that would give the developers a clean source of truth. Many components were redundant or duplicated and there was no way to track back on design decisions.
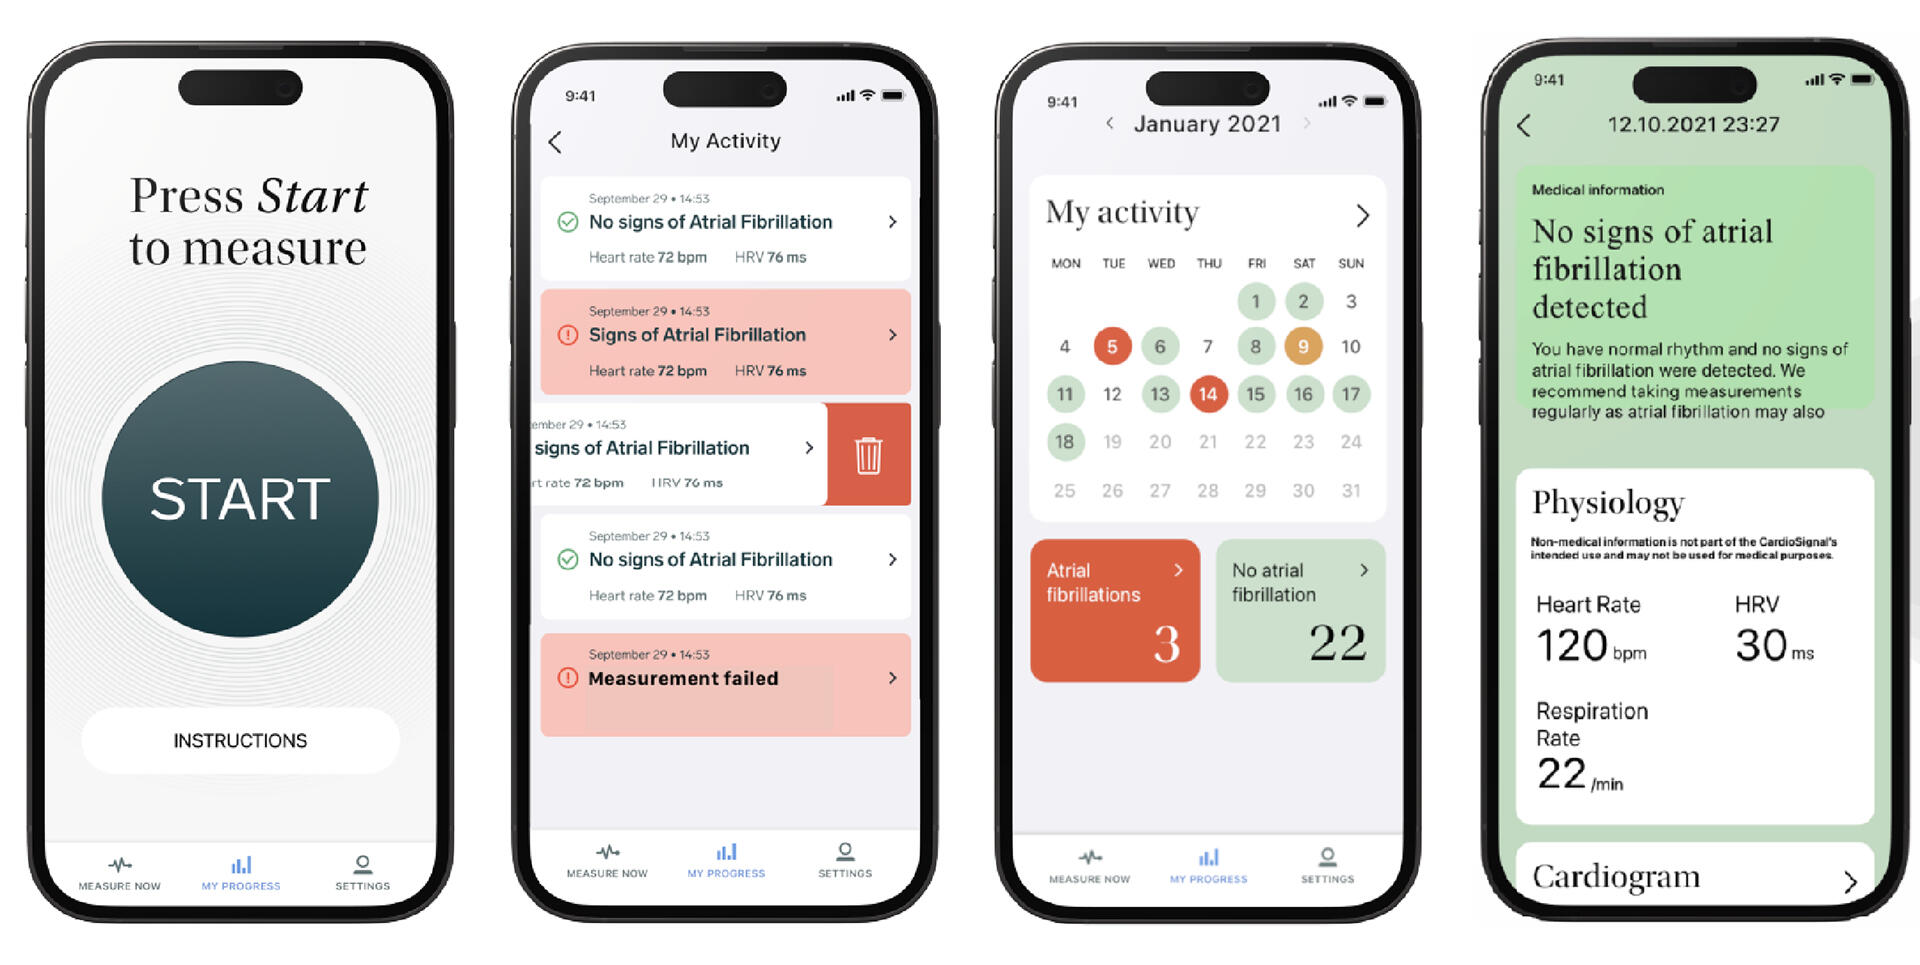
App state before I started working
A solution: A Design system
A design system was needed to weight what things already exist, what things need attention and what can be let alone. To get started with the design system, I set the foundations based of Material Design 3 as Flutter supports it, it would give us an advantage when need to cut corners.The foundations follow the tokens used in Material design 3.
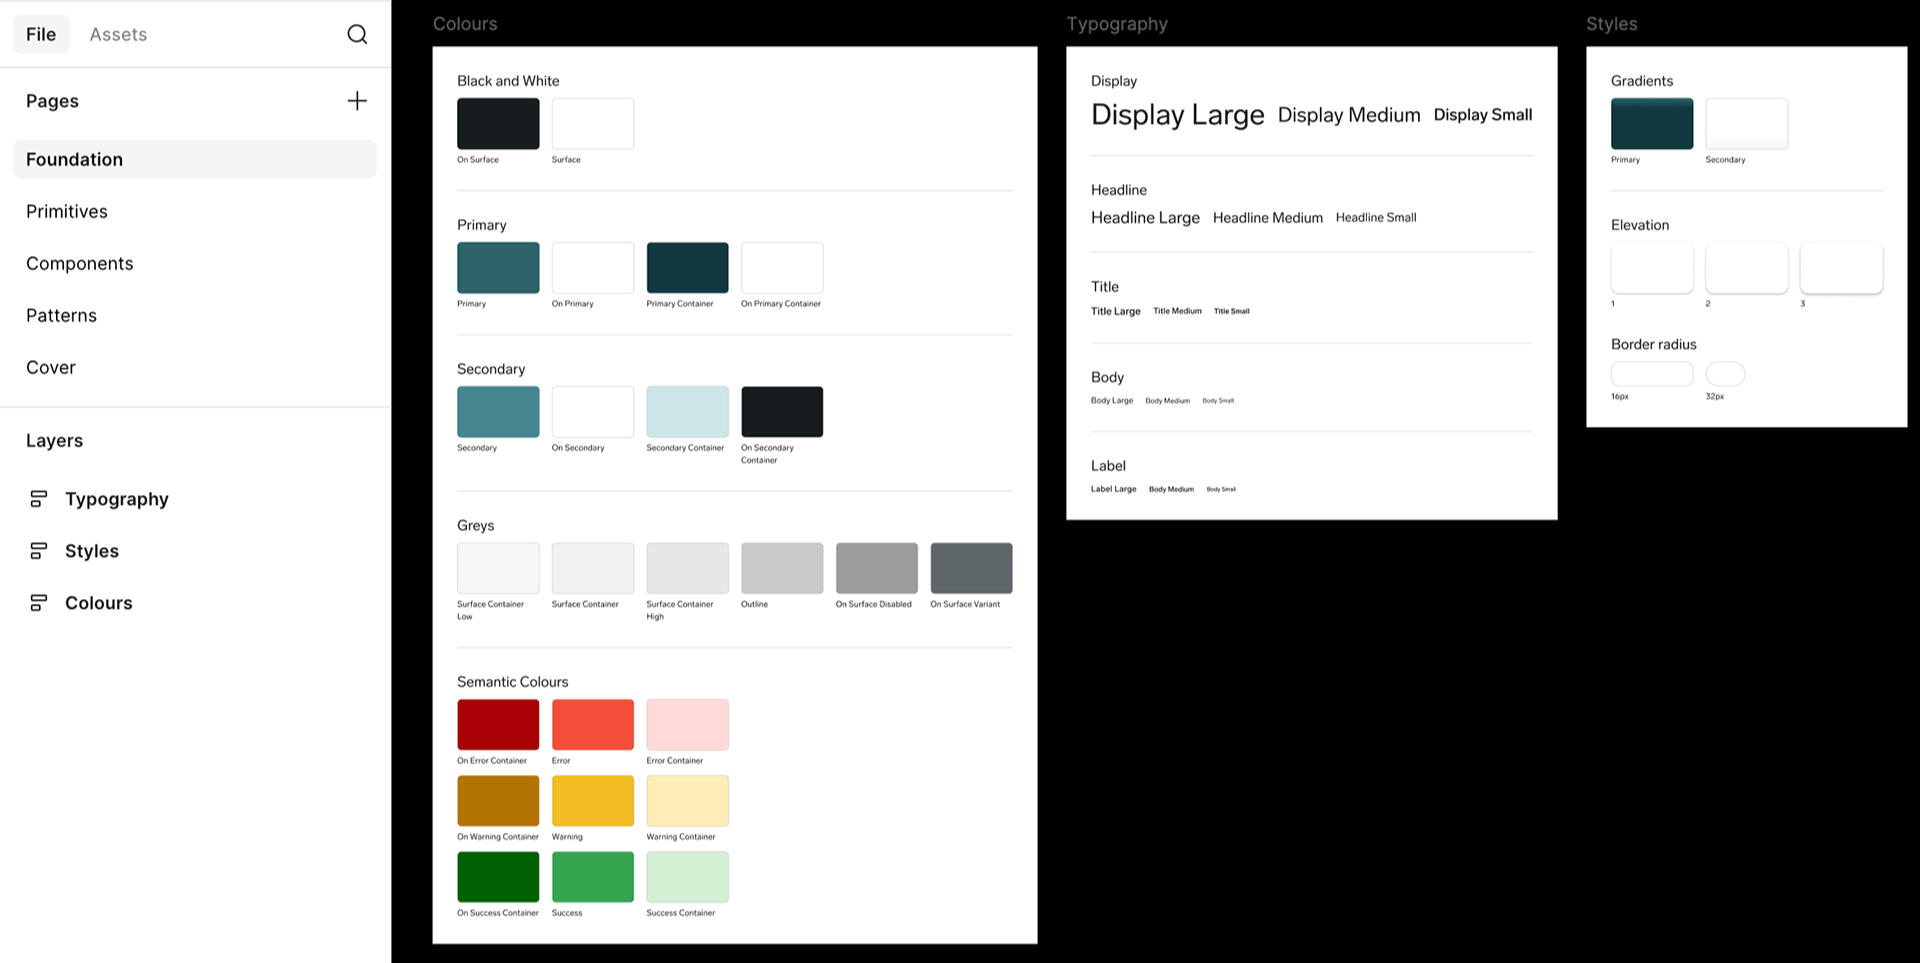
Having in mind our users, I picked colours that have enough contrast for people with compromised sight. Aiming for WCAG AA.Now we have a solid foundation for recreating the components in a design file.
Components
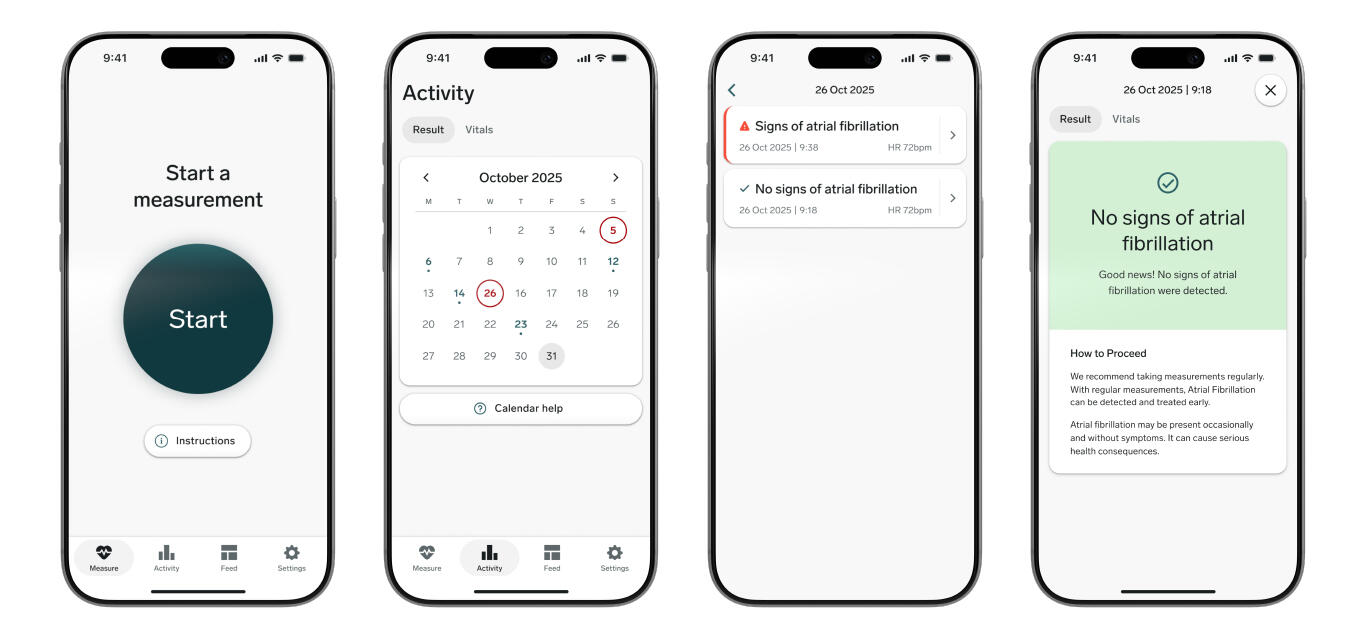
Built based on the tokens previously defined, I created a set of components that can be reused throughout the app. This came in the best time since new products can be based on these same components.
challenge ii
Establishing as well documented design process
Designing in a regulated medical context introduces a fundamental tension: every change must be validated, documented, and traceable.I started by tackling traceability at the handover stage. Figma remained the design tool of choice, but for handovers in this case I prefer Zeplin. It gives an easier glance at the views and offers a good traceability feature.I decided to also participate in creating the Jira tickets for developers. This would create an immediate action point and place for discussion in case something goes wrong.The design process goes like this:

Outcome
Over time, the impact became measurable. Design and development cycles grew faster as teams stopped solving the same problems twice. Inconsistencies reaching production decreased, and the cost of future changes dropped significantly.
My Design Process
It started with a problem
I tried knitting and it got difficult... It happens that keeping count is not that easy! We get distracted, we forget and our inner-counter resets. There was my problem. In an era of AI, how difficult could make an app that counts for me can be? Not difficult at all!
I started vibe-coding with Claude and suddenly I got an app. On my phone, that saves my projects and helps me keep count. Fantastic! I'll use this app to go through my design process.
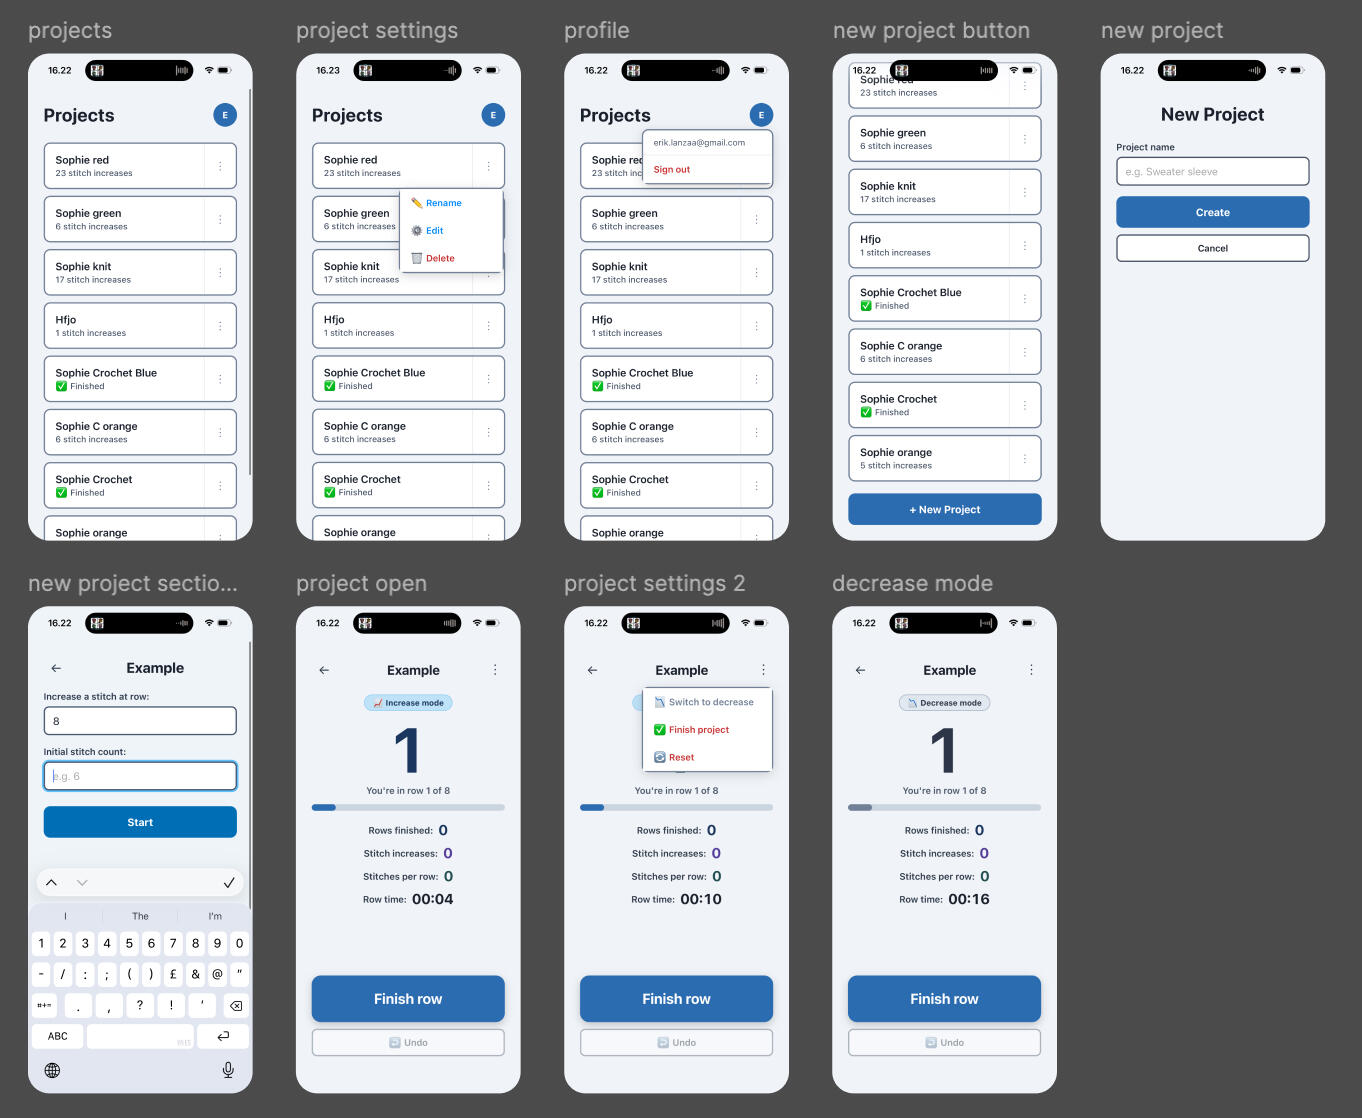
Claude's vibe-coded app
Let's do some research!
I would start a challenge by seeing what's already out there! I checked google, some blogs, YouTube. Seems like the frustration is out there but no easy solution. Some apps I found solve different problems but not mine. I concluded that perhaps my app is going to be very niche, but that's ok, I am not trying to sell it. I am documenting my process. Right! Let's go!
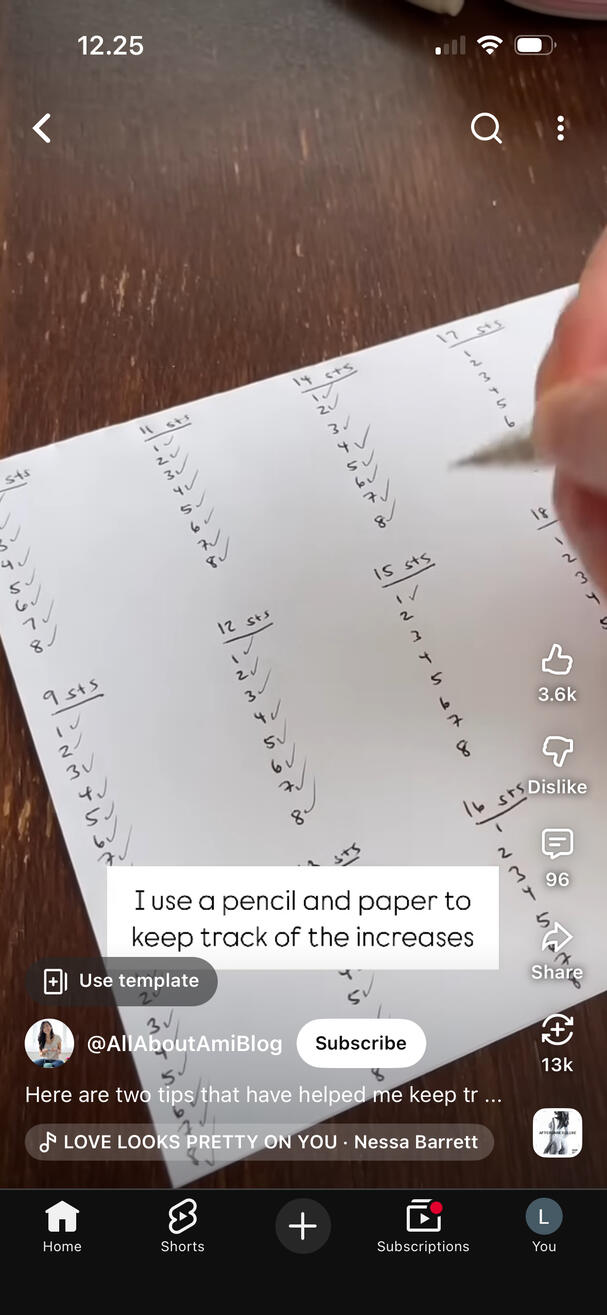
YouTube short explaining the same problem and using pen and paper as a solution
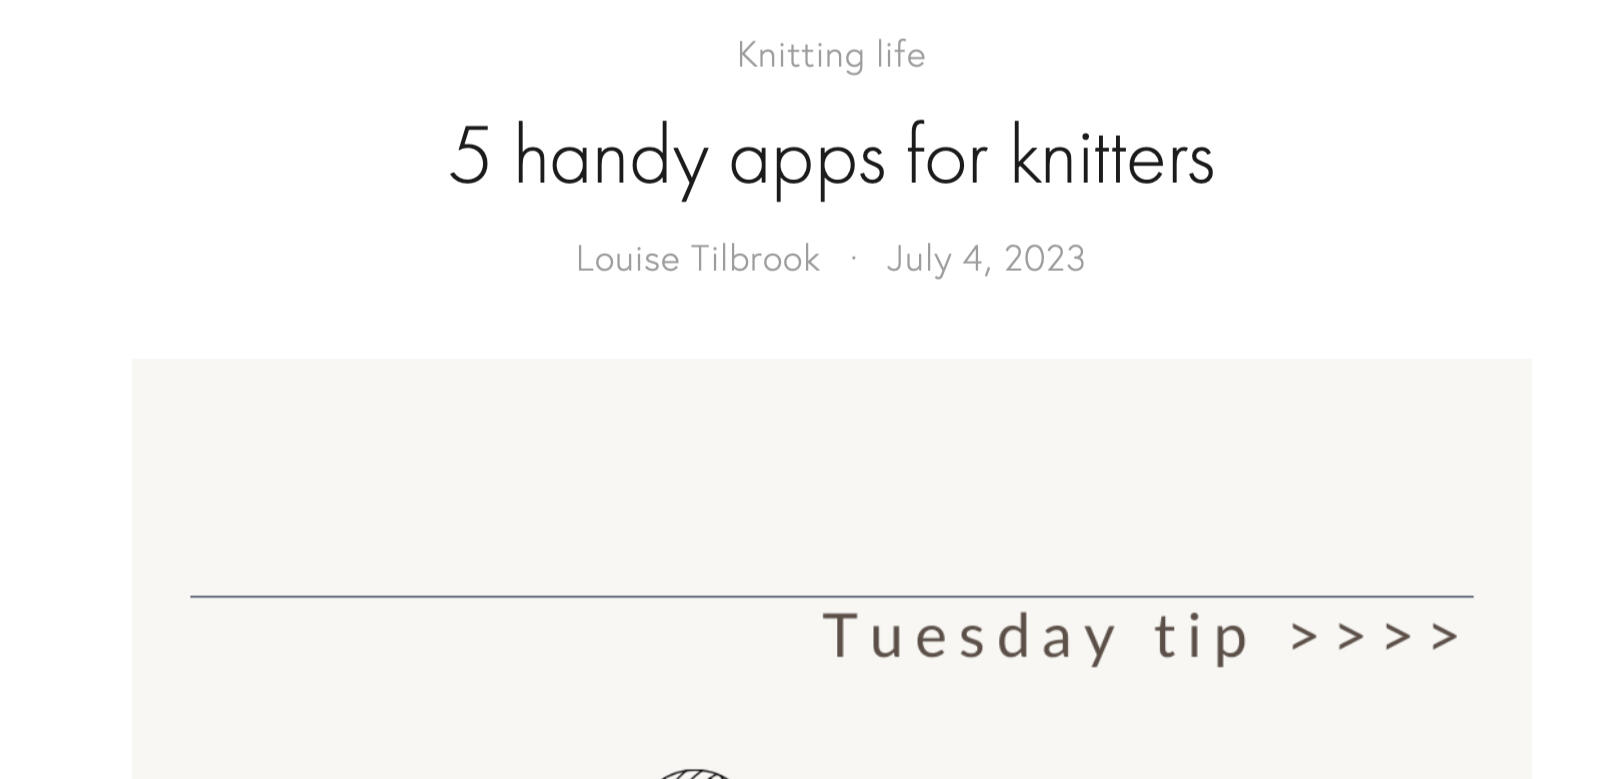
Online post listing the best apps for knitting
The competitive landscape
To try to understand where my app would fall, I am comparing it to other apps out there. Let's see what would make my app unique, in case I want to sell it some day...
| App | Cycle tracking | Stitch math | Mobile-first | Setup speed | Offline |
|---|---|---|---|---|---|
| Knit Companion | Partial (reminders) | No | No (tablet-first) | Slow | Yes |
| My Row Counter | Partial (secondary counter) | No | Yes | Medium | Yes |
| Easy Knitty | No | No | Yes | Fast | Yes |
| Skeins | Yes | Yes | Yes | Fast | Yes |
According to my chart, there are some ways I could stand out! I'll keep that in mind.
So, who am I designing for?
Basically myself, but let's think that there are three types of people reach for Skeins (That's how I named the app):
The everyday knitter. Knits in short sessions around daily life. Often loses context after breaks. Expects tools to be immediately intuitive and will not read instructions.
The focused maker. More experienced and often juggling multiple projects. Finds existing apps bloated and distracting. Wants something lightweight that stays out of the way.
The first-time shaper. A newer knitter attempting a shaped piece for the first time. Does not yet fully understand increase cycles. Needs the app to make the concept clear, not just track progress.
The core job
"When I return to my knitting after a break, I want to instantly know where I am in the pattern cycle, without having to mentally reconstruct my progress, so I can resume knitting right away."
Let's test the prototype
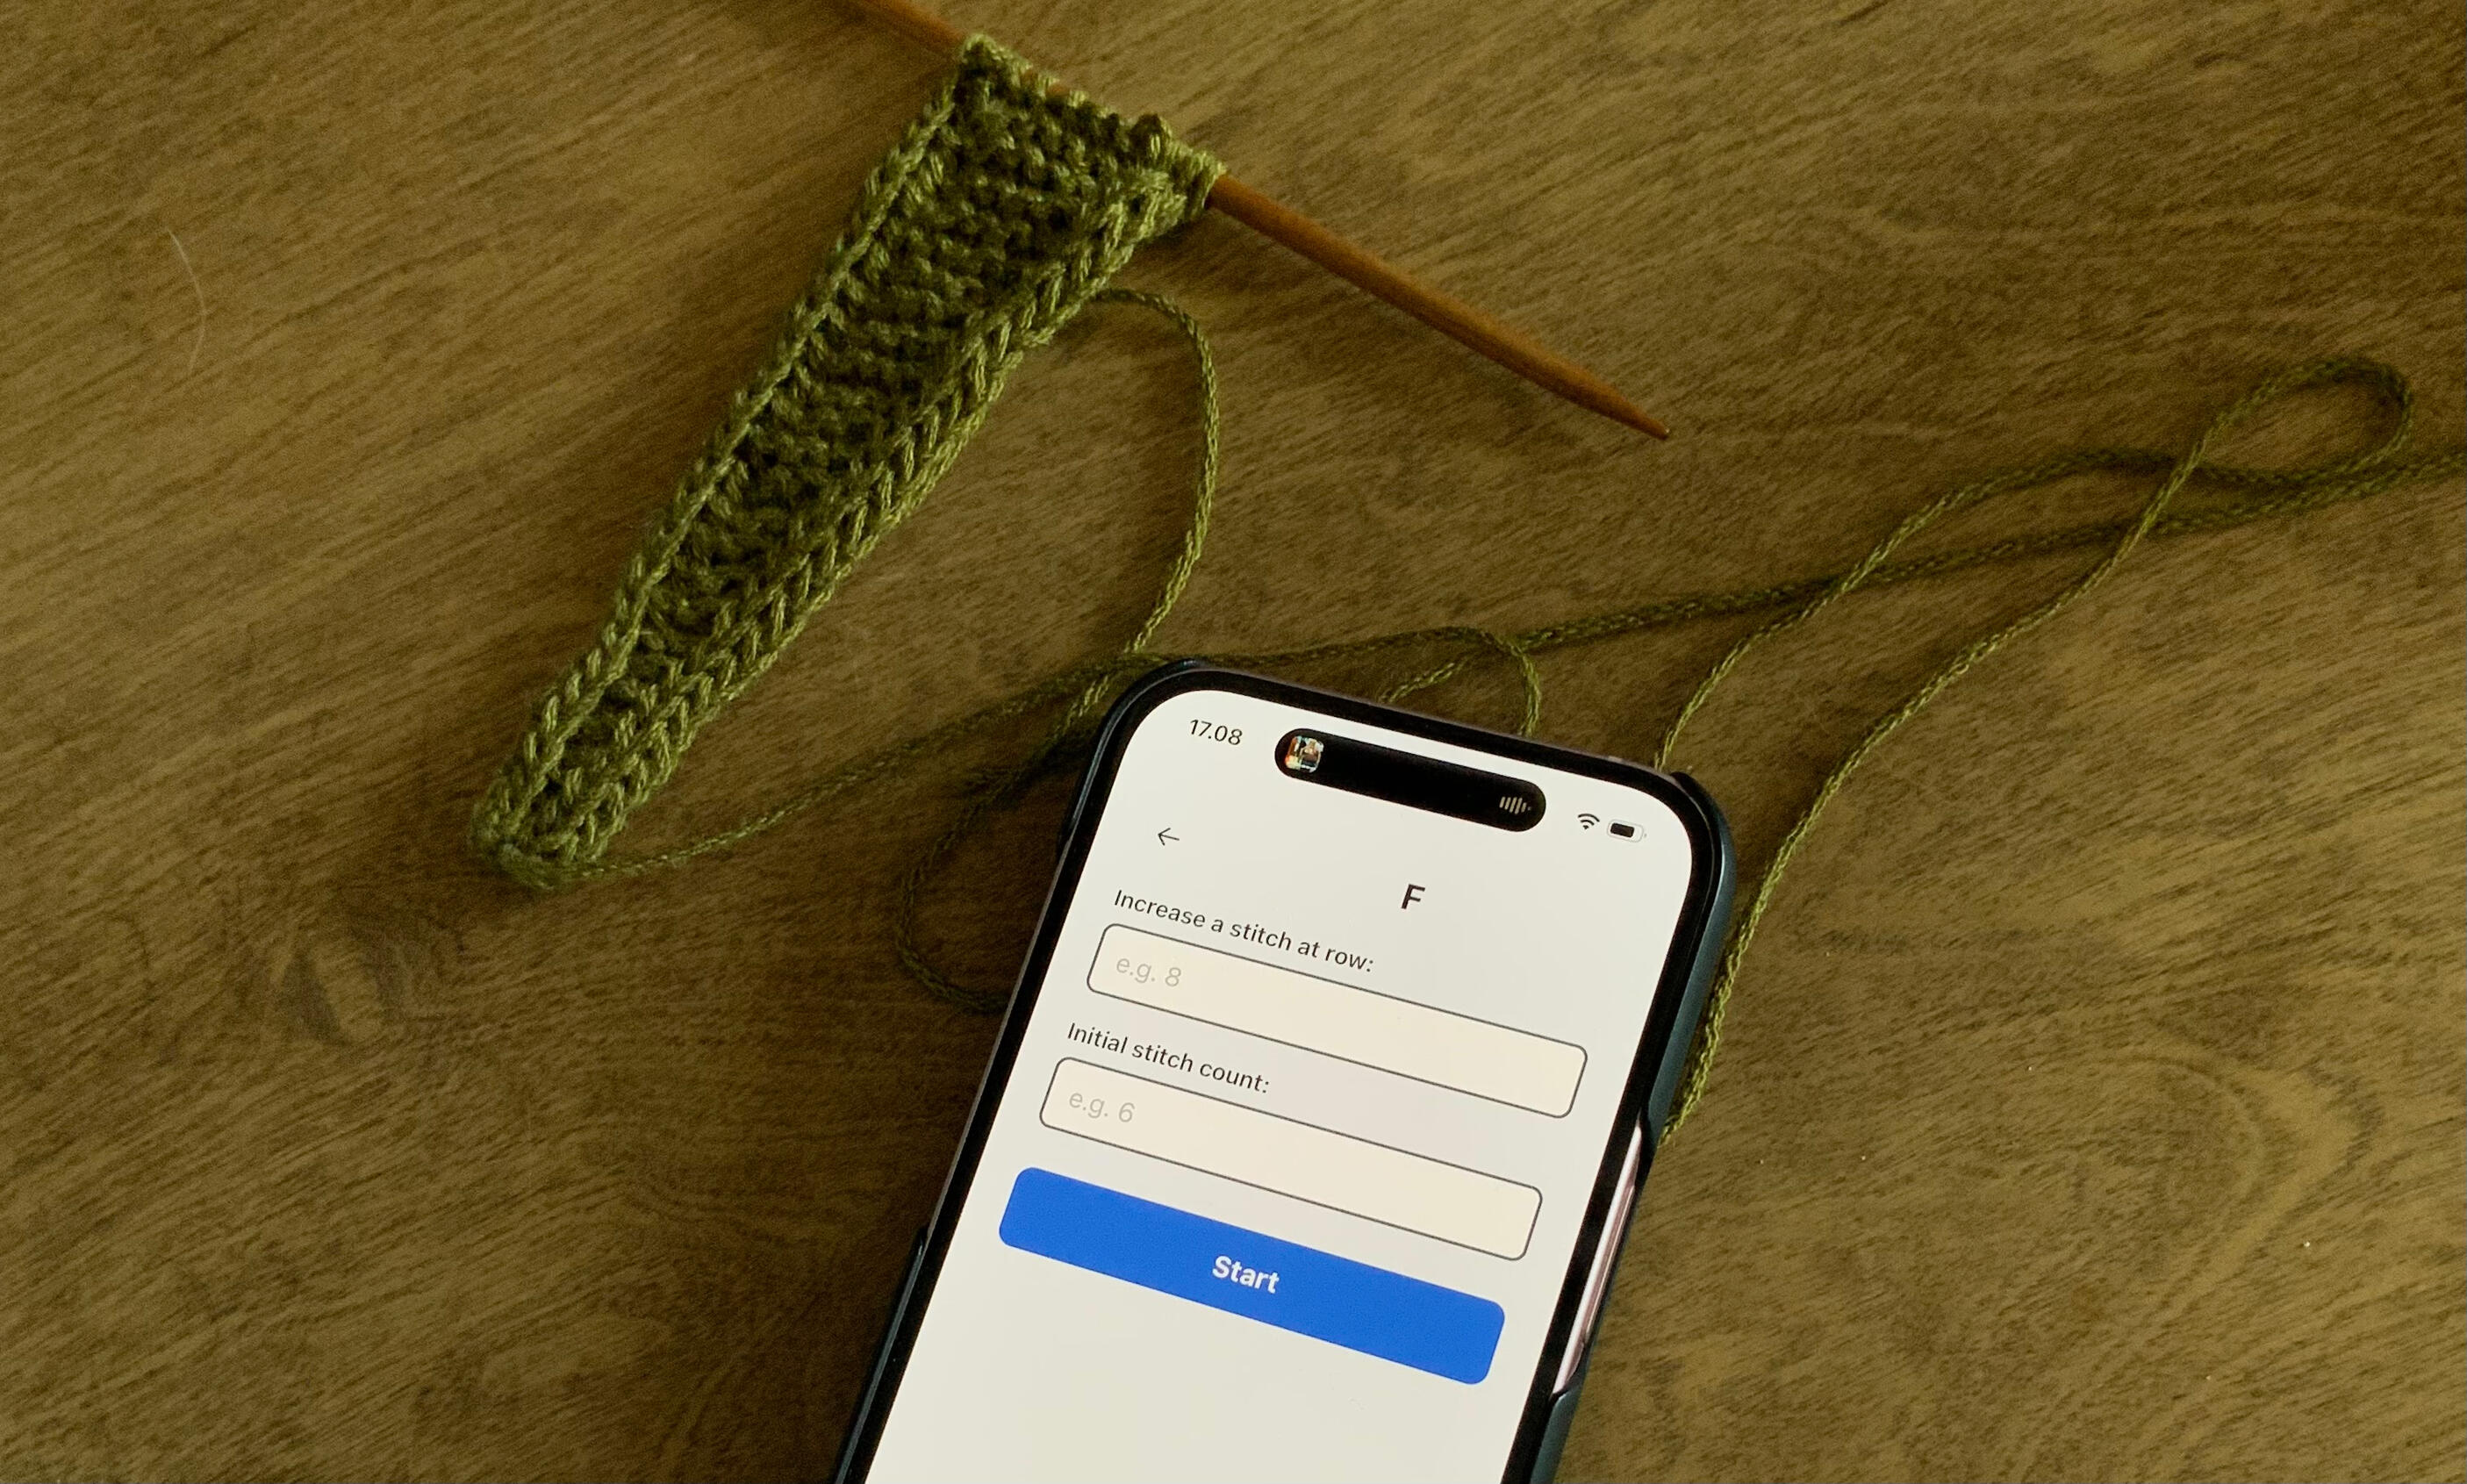
I told Claude to make me a prototype with a series of assumptions I made about the user (me) and the app. In real life, this would be a good time to test if those assumptions were accurate. I gave the prototype to my partner, who happens to be a more experienced knitter.The app is tailored for a specific pattern. In the pattern, there is a start stitch count and an increase that happens every 8 rows.I handed him the phone and told little to nothing about what the app did. Just said it was for knitters. A couple of problems quickly raised:
He didn’t know what to enter in the increase interval field because he didn’t know the Sophie Scarf’s interval. The app asked for a number but didn’t explain what that number represented.
After completing row seven, the app told him an increase was due on the next row. He wasn’t sure whether to act immediately or after knitting one more row. The message was unclear.
What this revealed
Both issues point to the same root cause. The app assumes prior knowledge. It expects users to understand knitting concepts and pattern structure before they can use the tool.
UX takeaway
The lesson here is that a tool like this cannot rely on user knowledge. It needs to make the underlying concept visible and unambiguous. Inputs should be self-explanatory, and outputs should clearly indicate action. If a user has to interpret meaning, the design has already failed.
What now?
Lucky me! This was an early stage prototype! Having this knowledge I can actually start planning my design on real user data. This gives me a great starting point to establish some design principles to follow in there rest of the design process:
One action per moment. Every screen should make the next step obvious. No ambiguity, no decision fatigue.
Context over count. Raw numbers are meaningless without position. The app must always show where the user is within the cycle.
Self-evident, not taught. If the user needs instructions to use the core feature, the design is wrong. Clarity must be built in.
Built for interruption. Knitting happens in fragments. The app must resume exactly where the user left off, even after days away. No reconstruction, no friction.
Scope
The first version will focus on counting rows and increasing them every X number. The app will be as simple as it gets, no preset patterns, no images or no "good to haves" just must haves.
We'll follow the same flow as the prototype done previously and polish the UX and UI where needed. The issues mentioned before will be a priority.
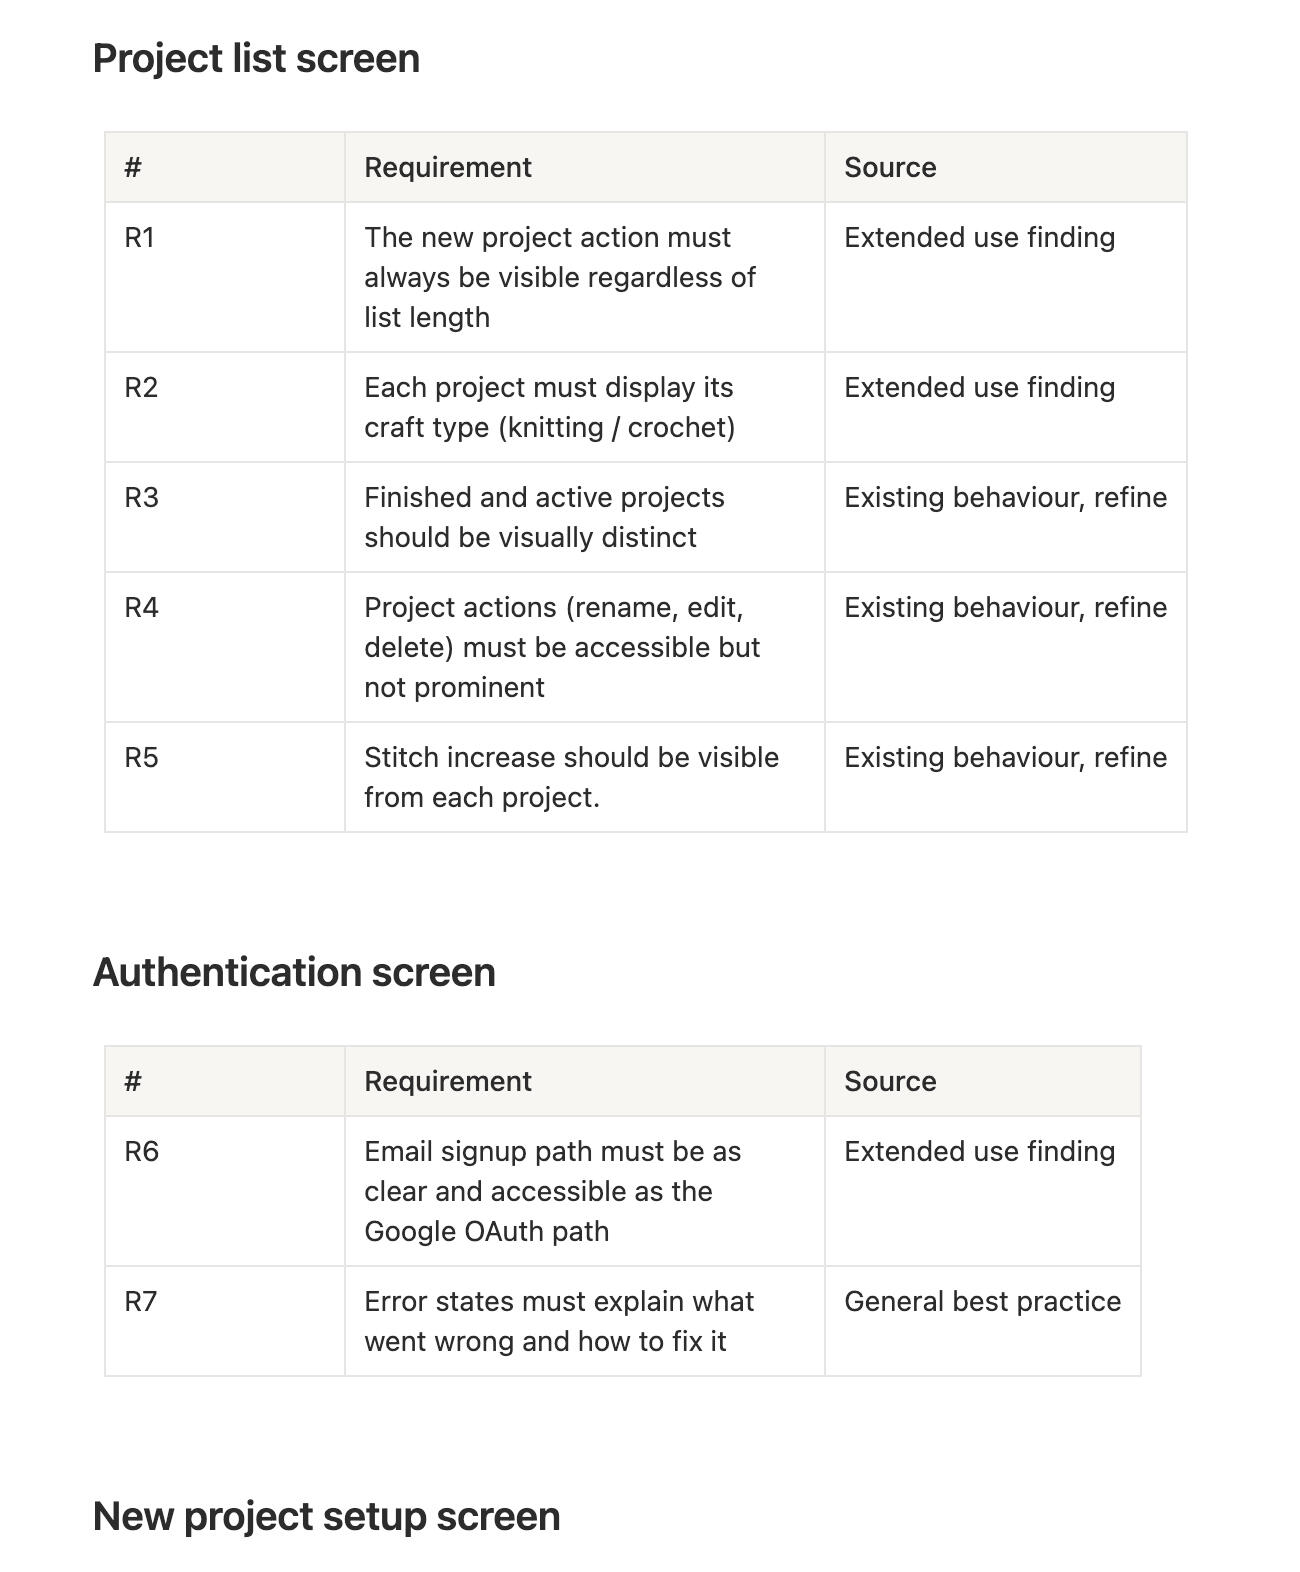
Requirements
Visual direction
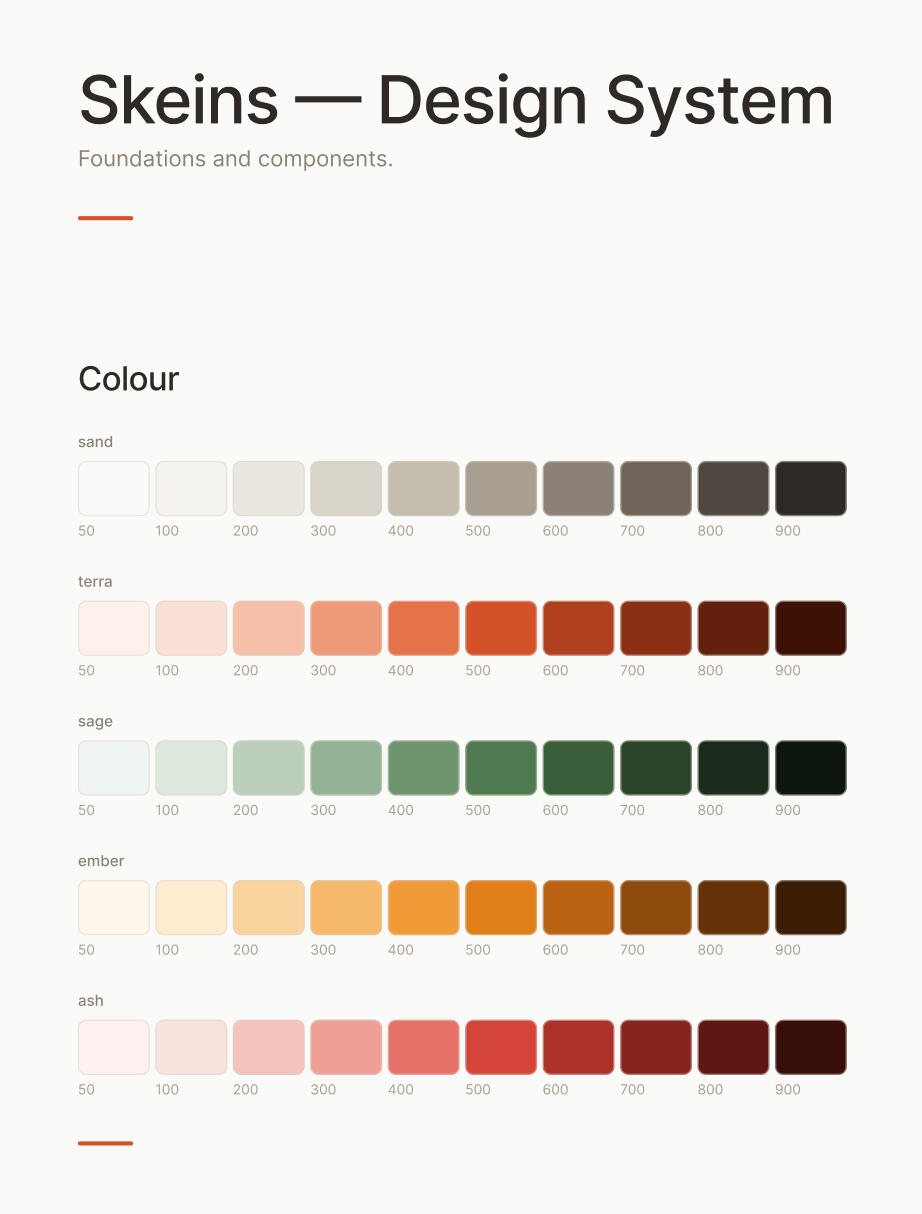
Having a working prototype to test and iterate, opened the opportunity to quickly move to the visual part: I moved away from the existing blue and white palette entirely. The app lives in the world of yarn and making, and it should feel that way. The new palette is warm and earthy: sand neutrals with a slight warm cast, terracotta as the primary action colour, sage for success states, ember for warnings. Shadows are warm-tinted.

The logo is inspired by a yarn hank.
The design system
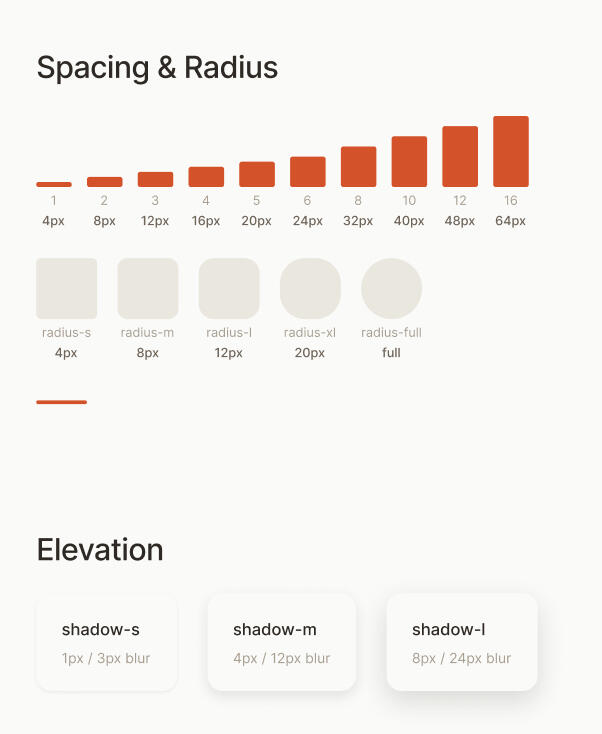
I built foundations first, then primitives, then compound components, then screens. In that order, without skipping steps. Colour variables cover both light and dark mode. Typography uses Inter at eight defined scale steps. Spacing is an 8px base unit.
Some changes based on the testings
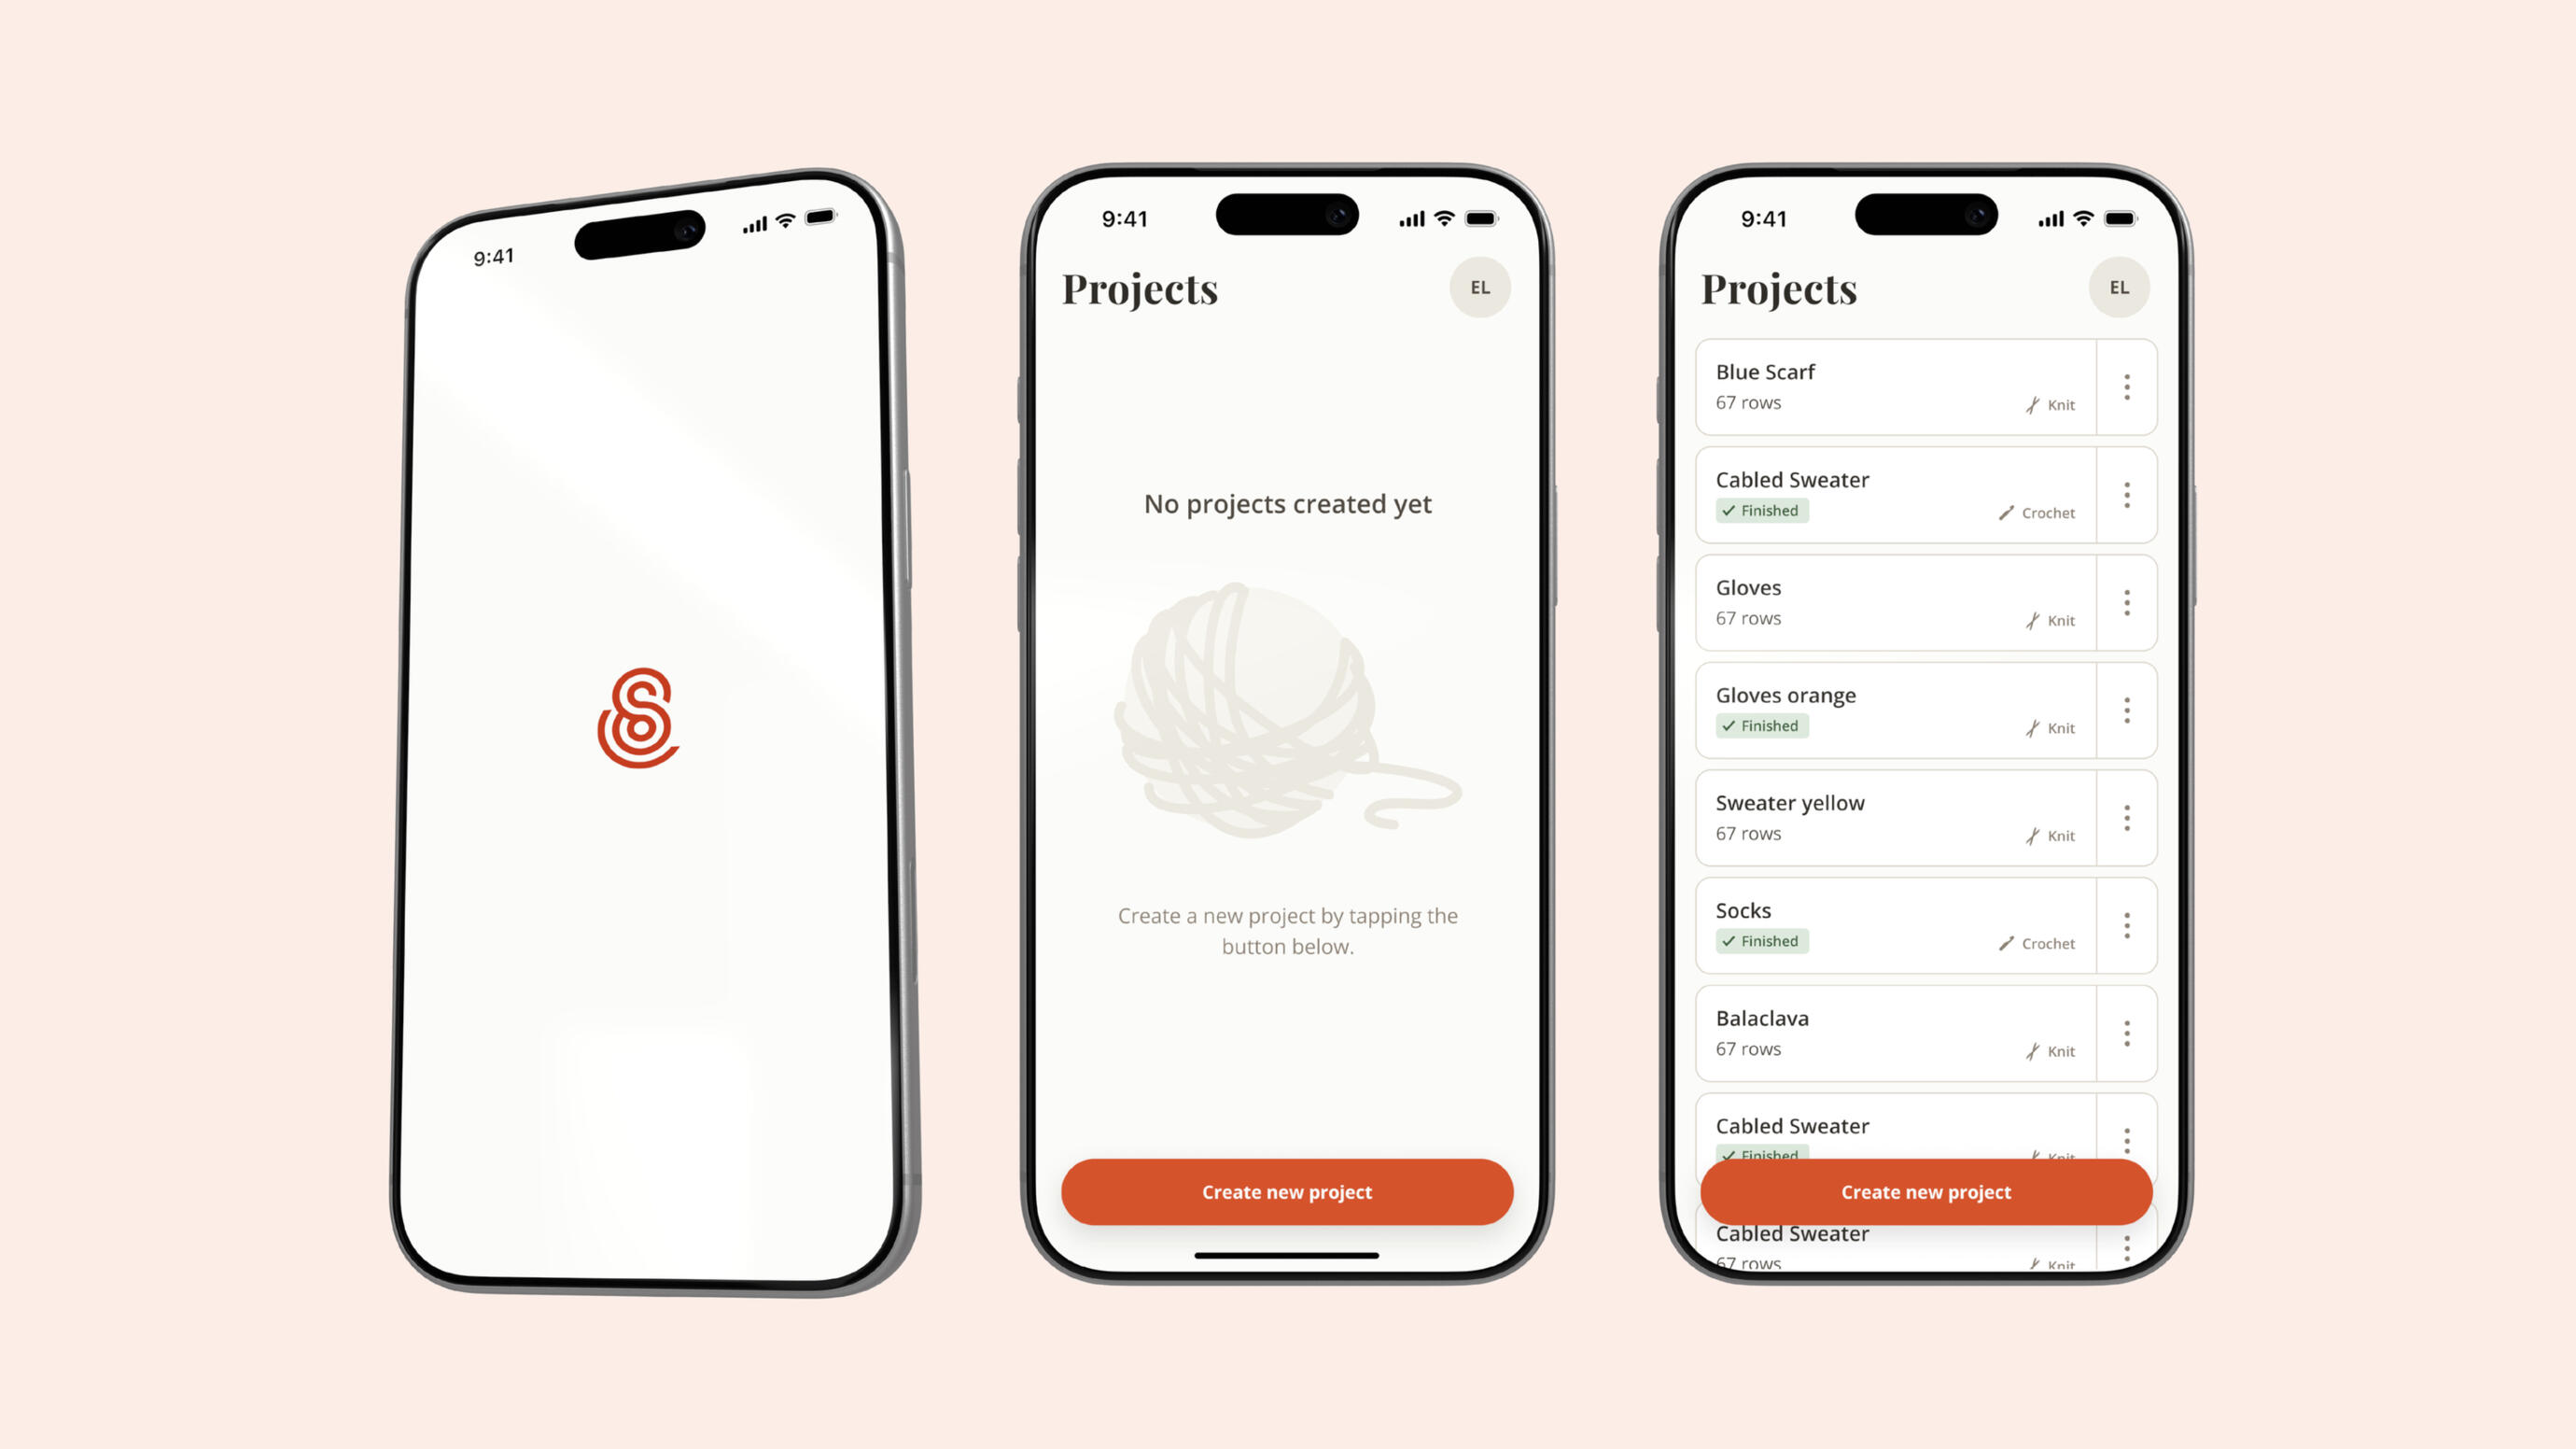
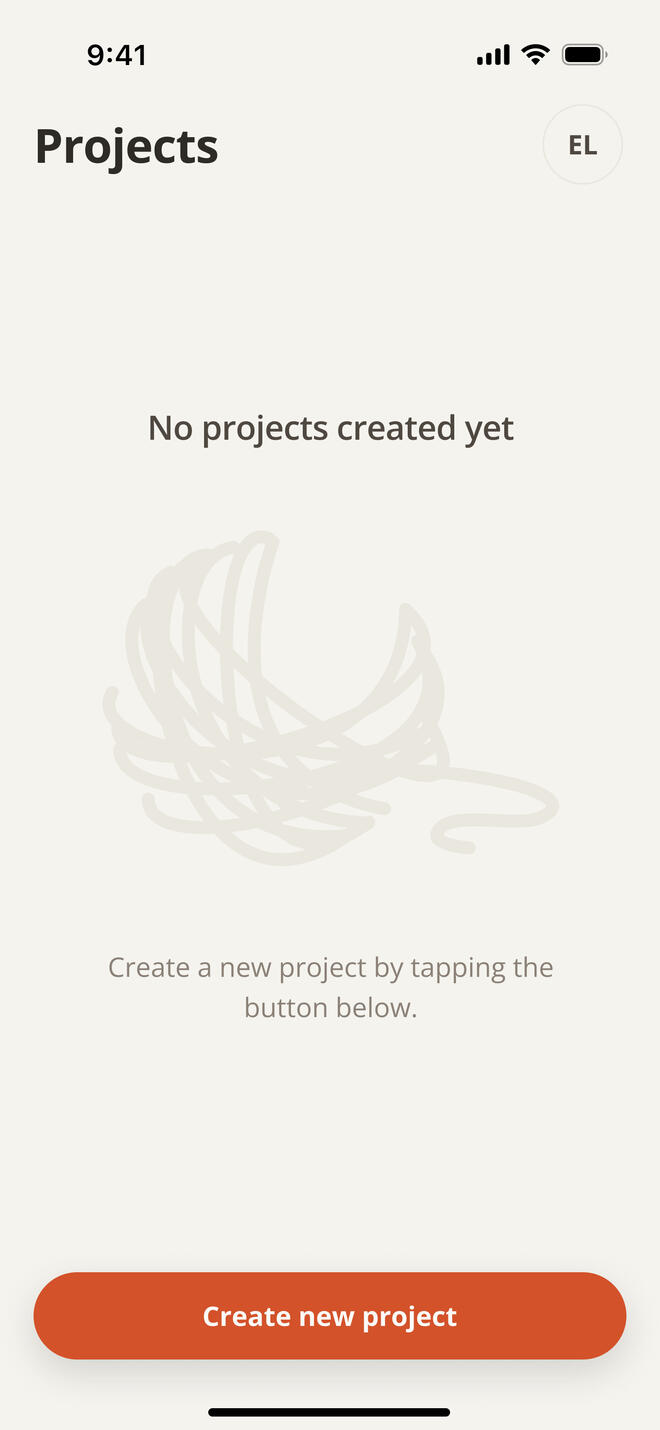
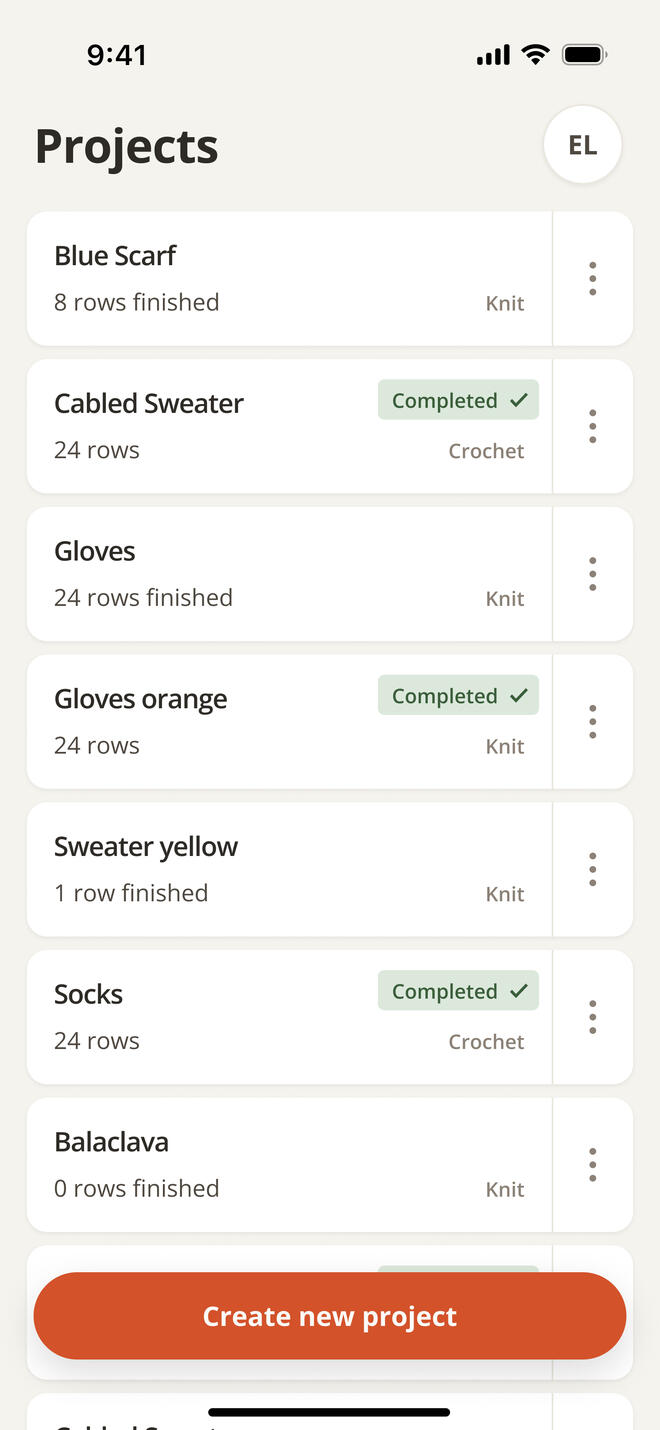
Projects screen
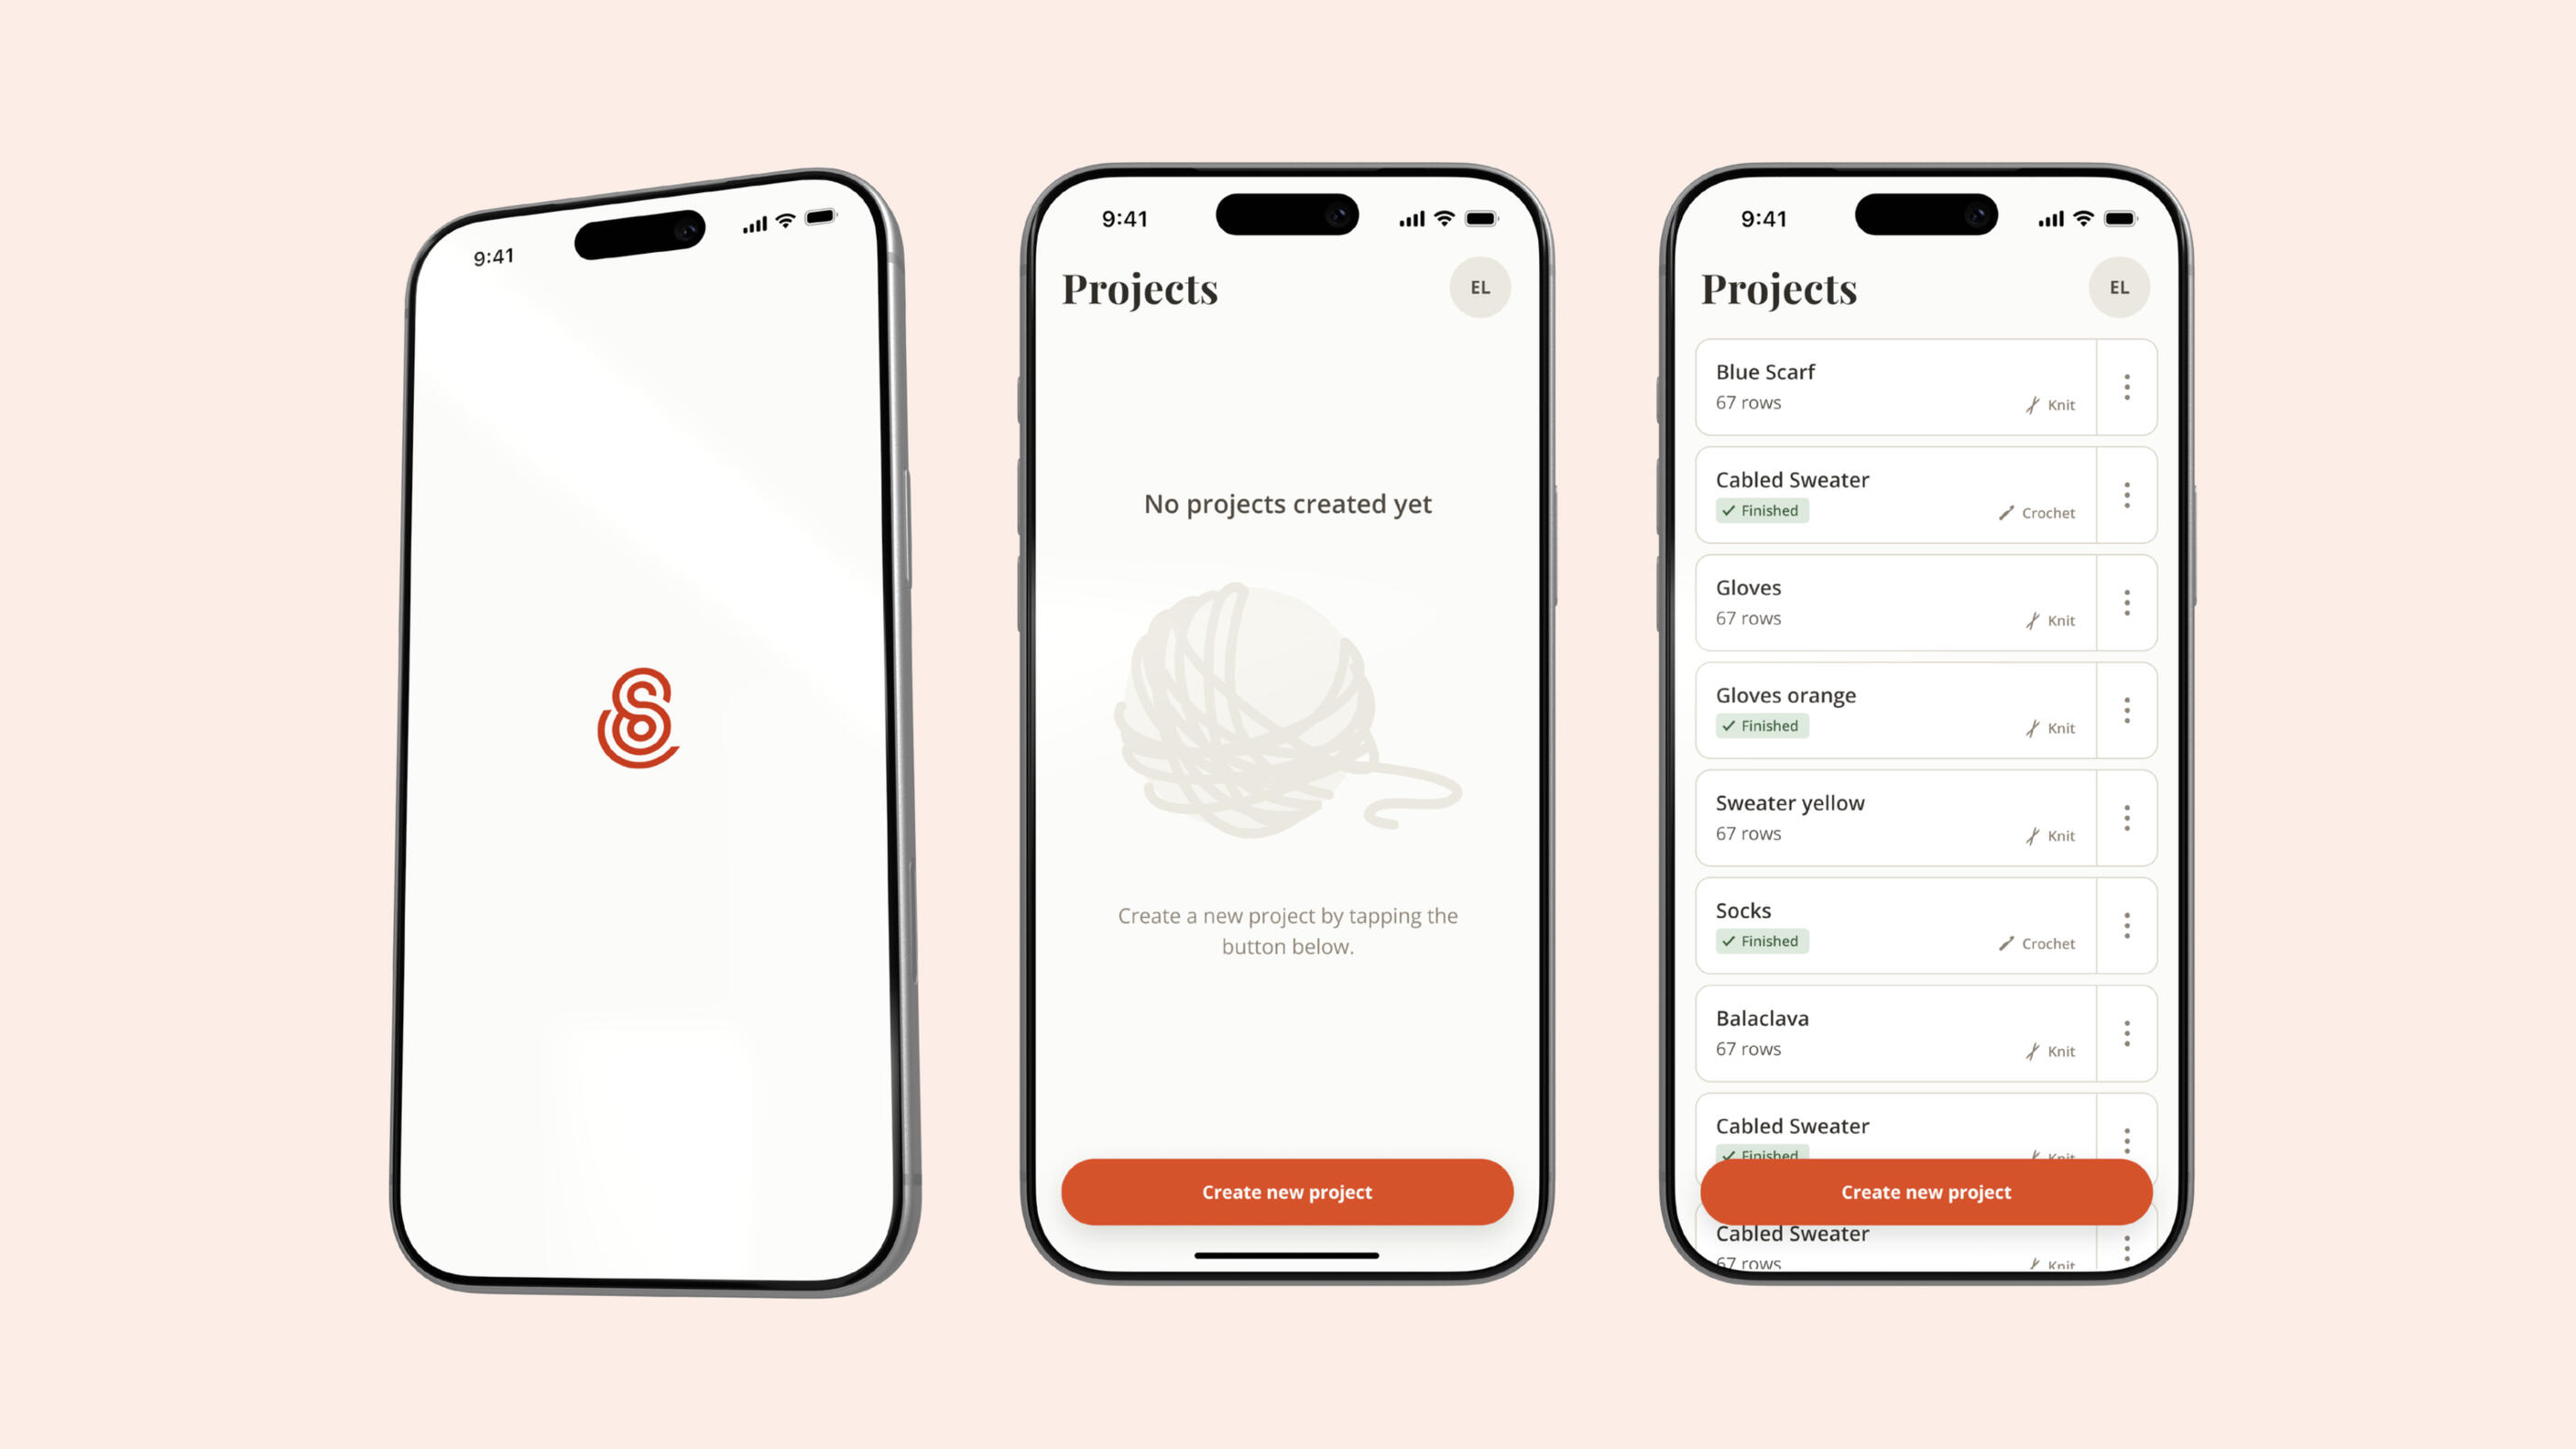
Each project card now includes a label, making it easy to distinguish between knitting and crochet at a glance. It also displays the number of rows completed for each project. Since this is an MVP and doesn’t yet support full progress tracking, rows completed serve as a simple indicator of progress. Completed projects are clearly marked with a badge.
Counter screen
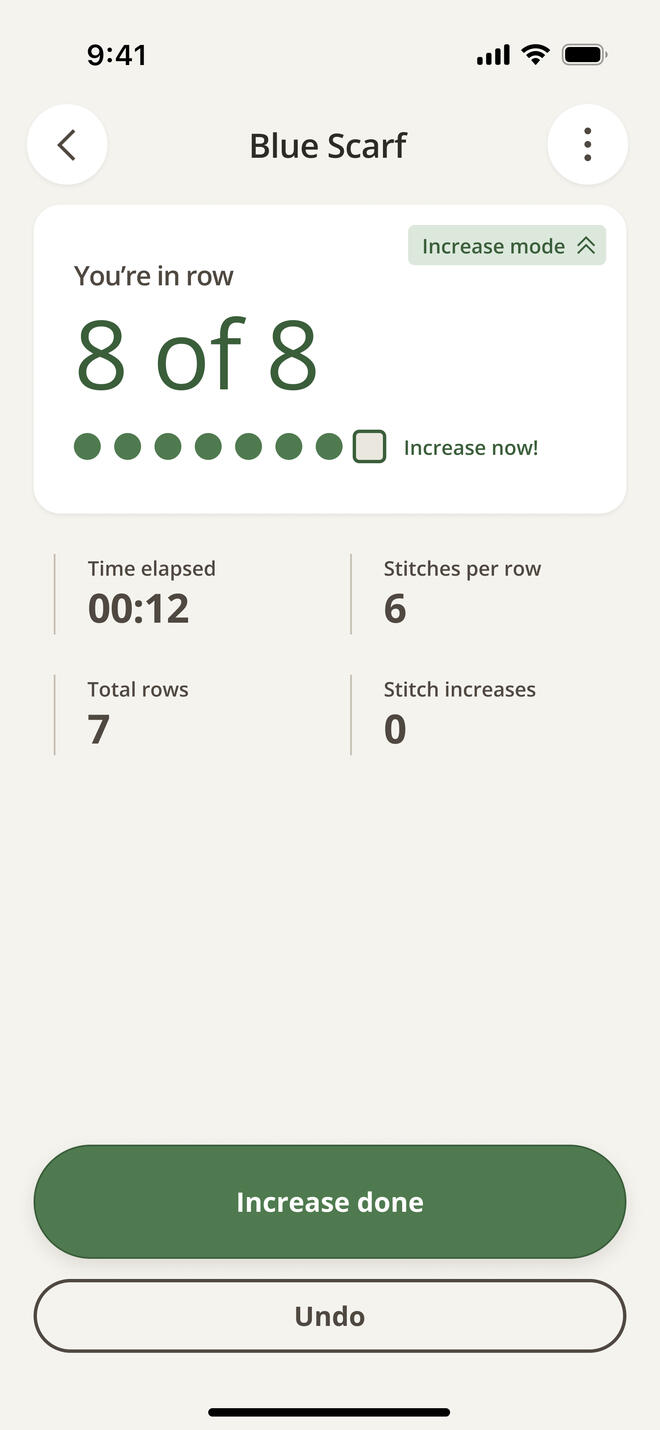
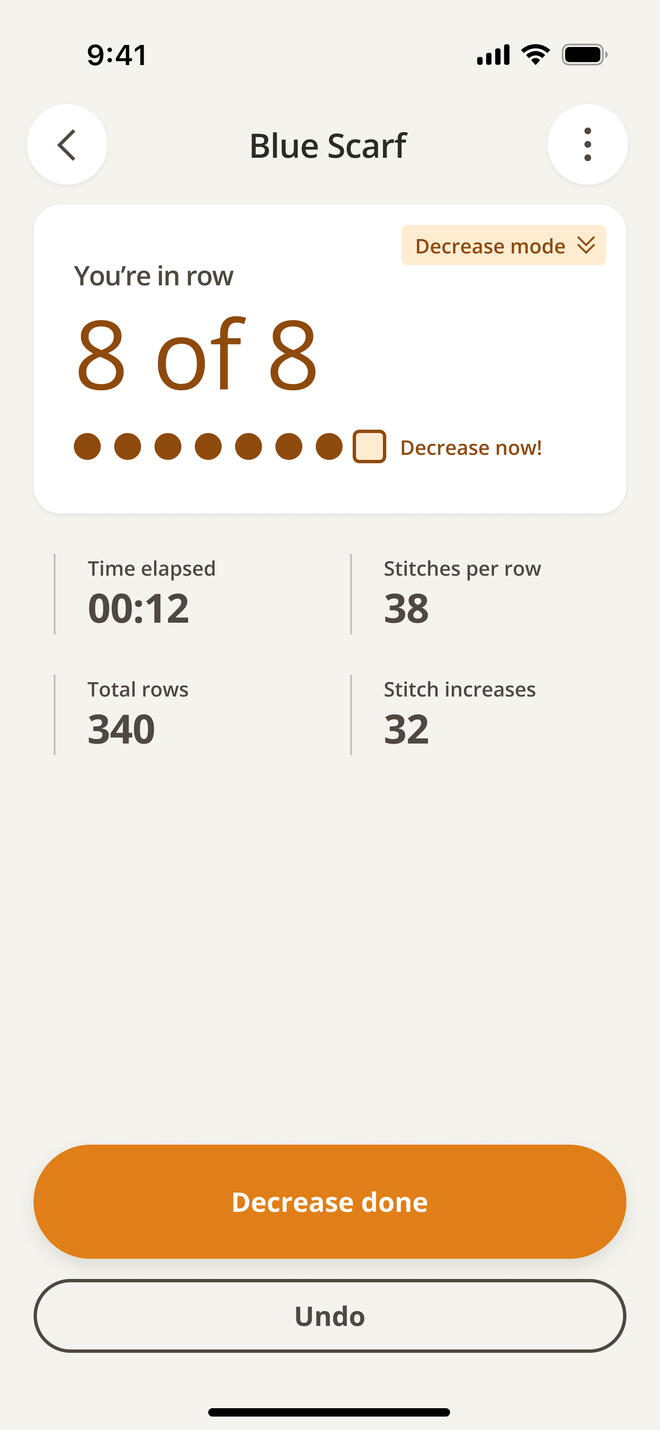
The counter screen offers two modes: Increase (green) and Decrease (yellow). It clearly highlights the current row using plain, accessible language, making it easy to understand at a glance. In addition to the text, a visual progress indicator reinforces which row you’re on.
The screen also displays key details for your work, including stitches per row and the number of increases completed so far. A built-in timer acts as a helpful safeguard, if too much time passes, it can signal that you may have missed an increase.
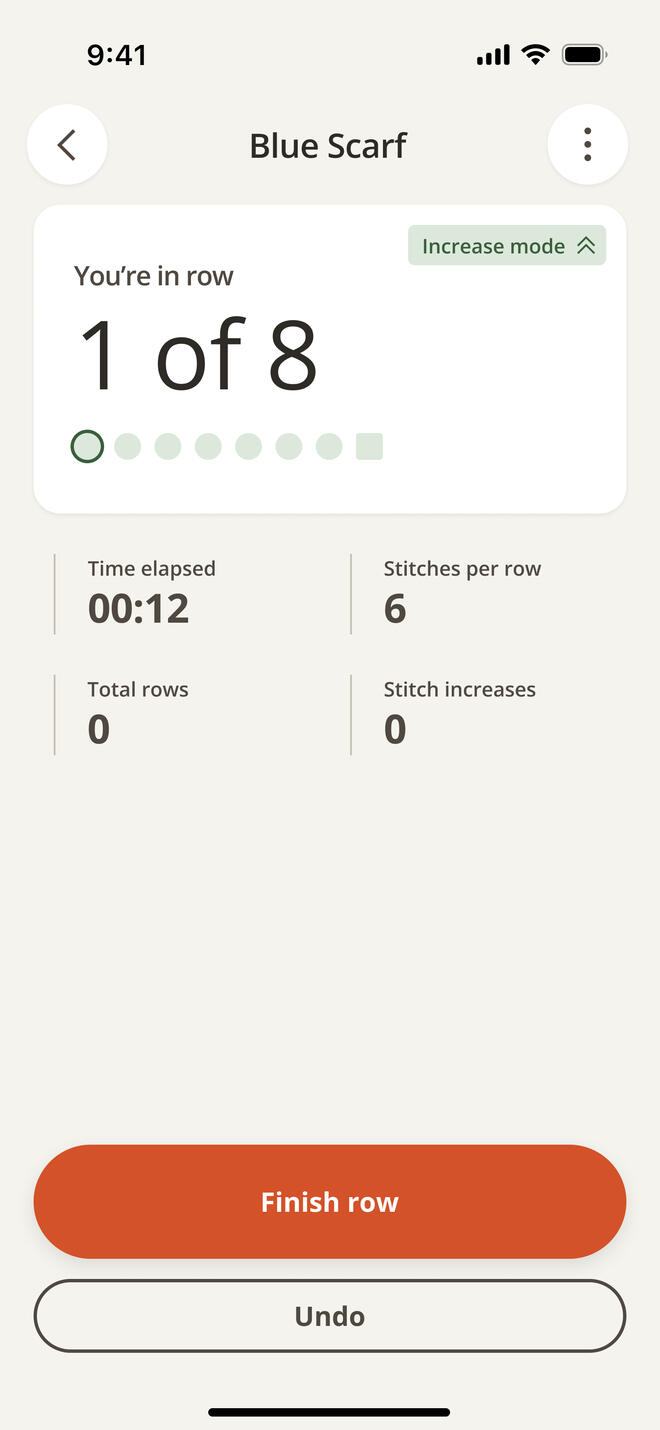
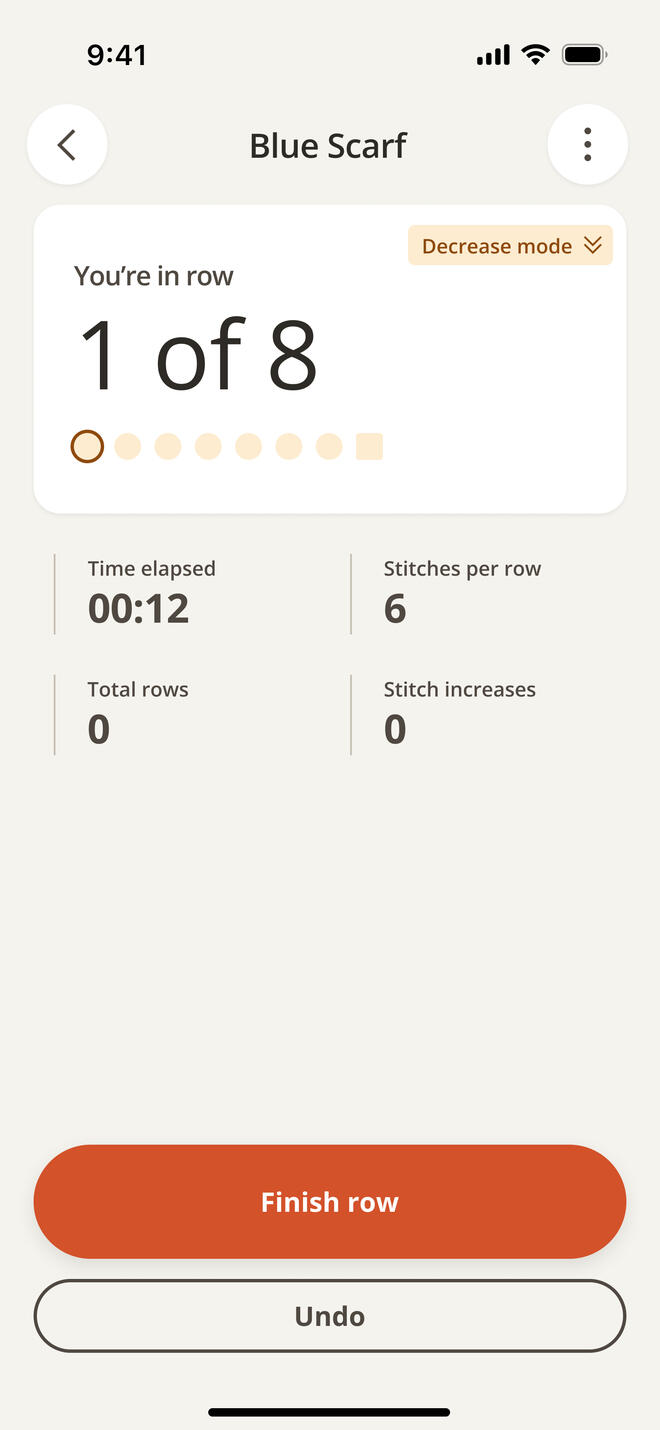
When it's time to increase or decrease, the app highlights the relevant row with a colour-changed button and updated label, a clear visual cue that an action is needed.
Now that the design foundations are in place, it would be time for a handover to dev and voilà, we have a product!
Visual Design
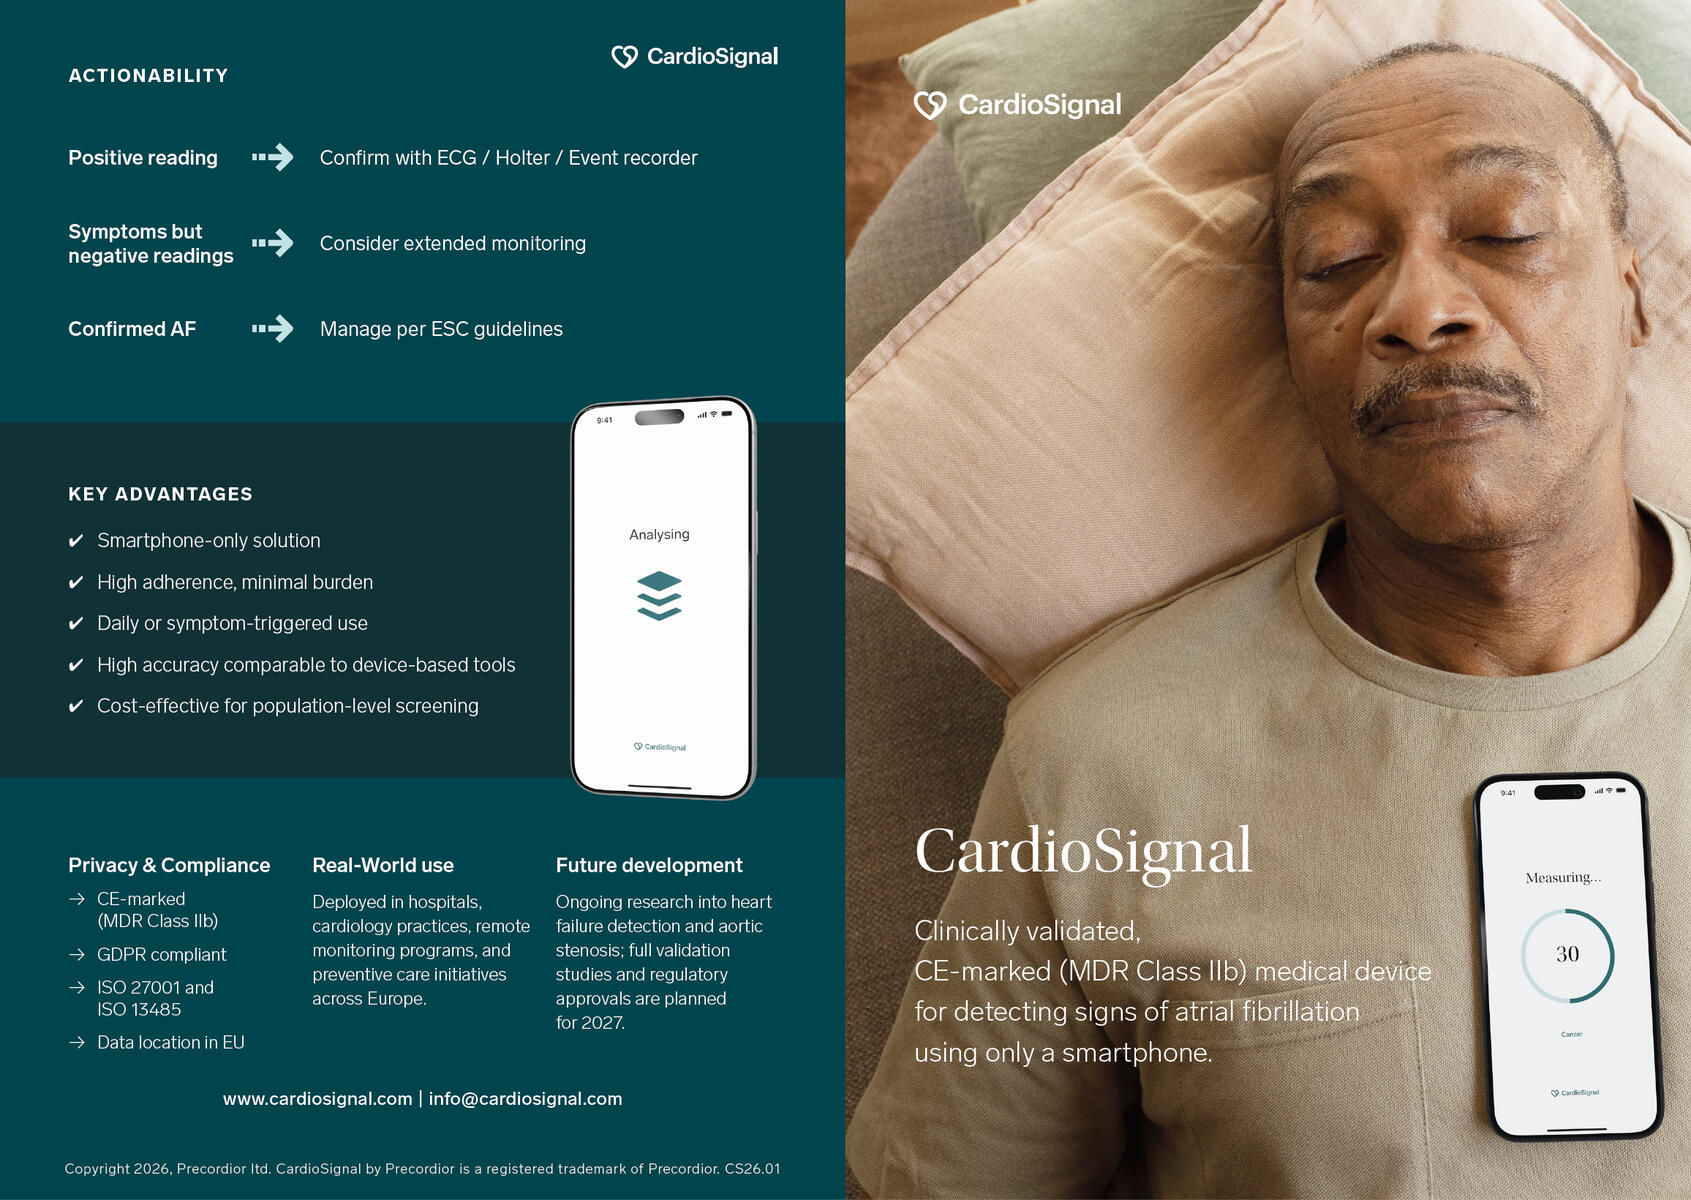
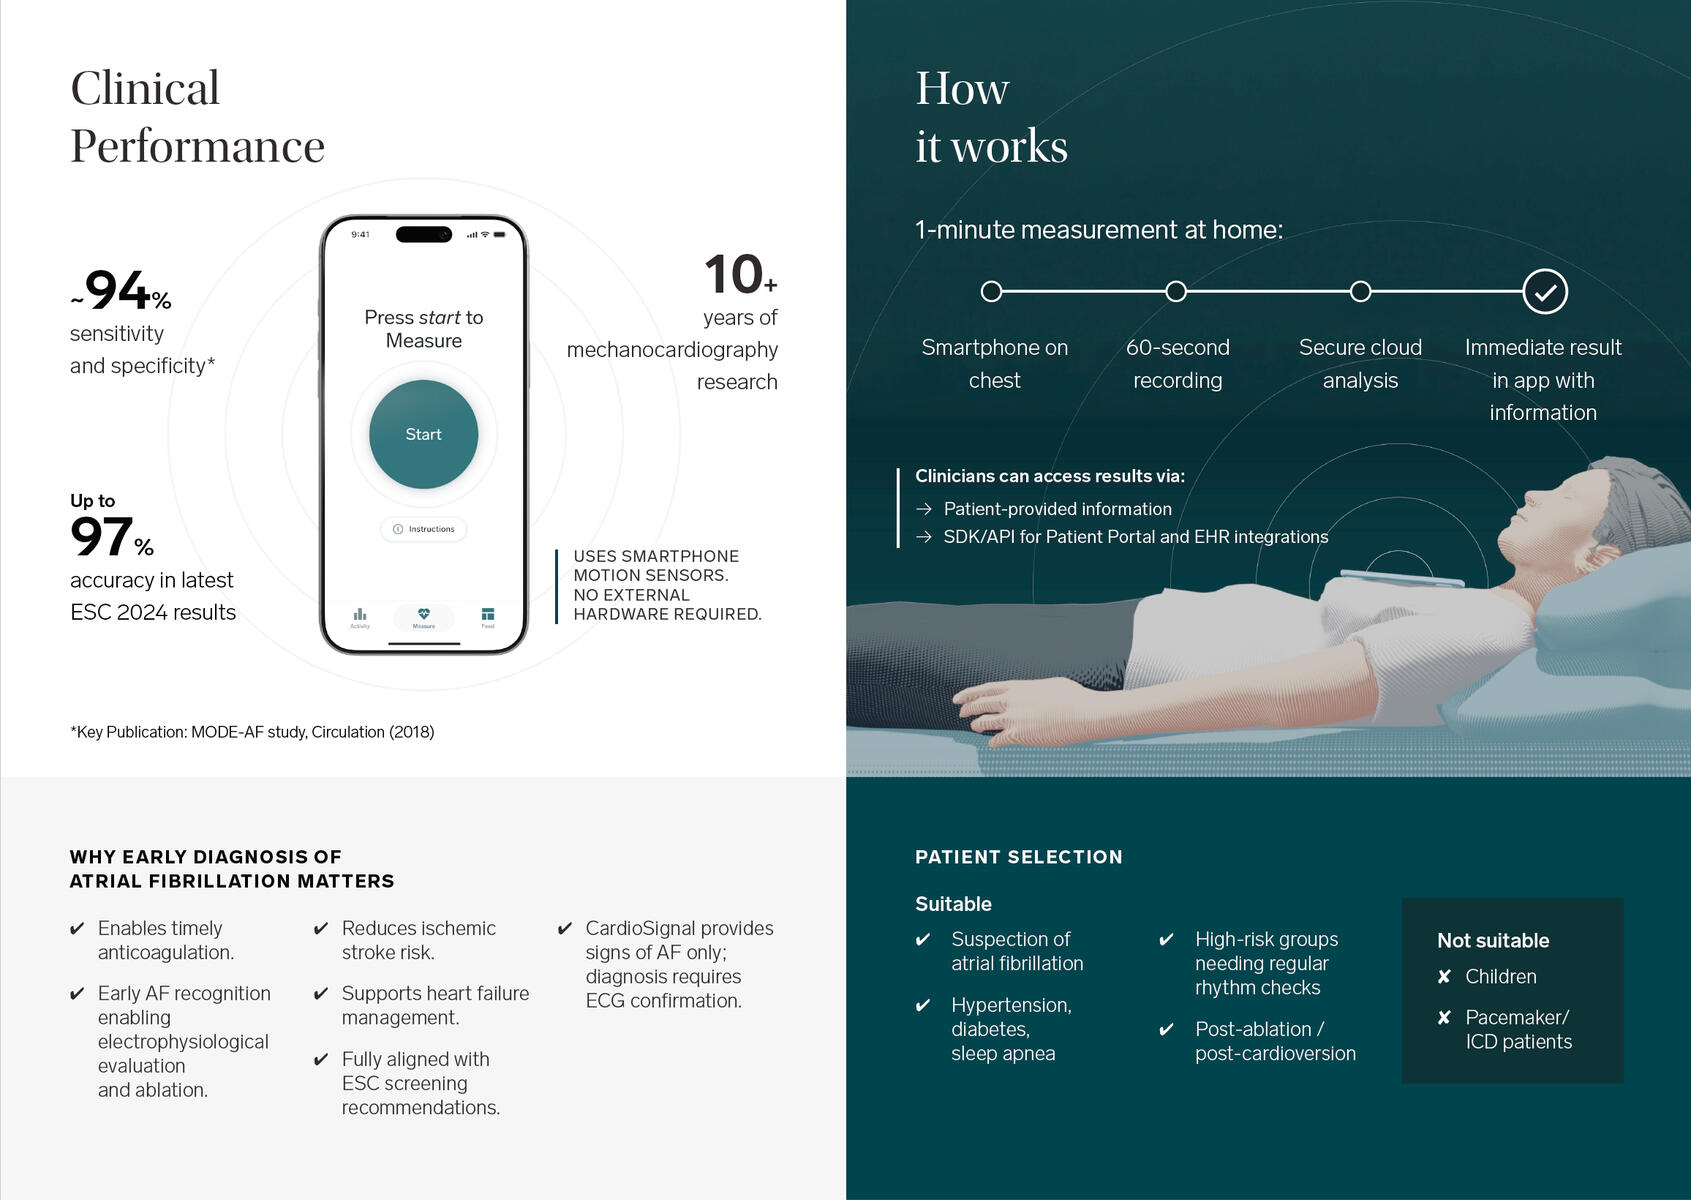
A collection of design work
CardioSignal
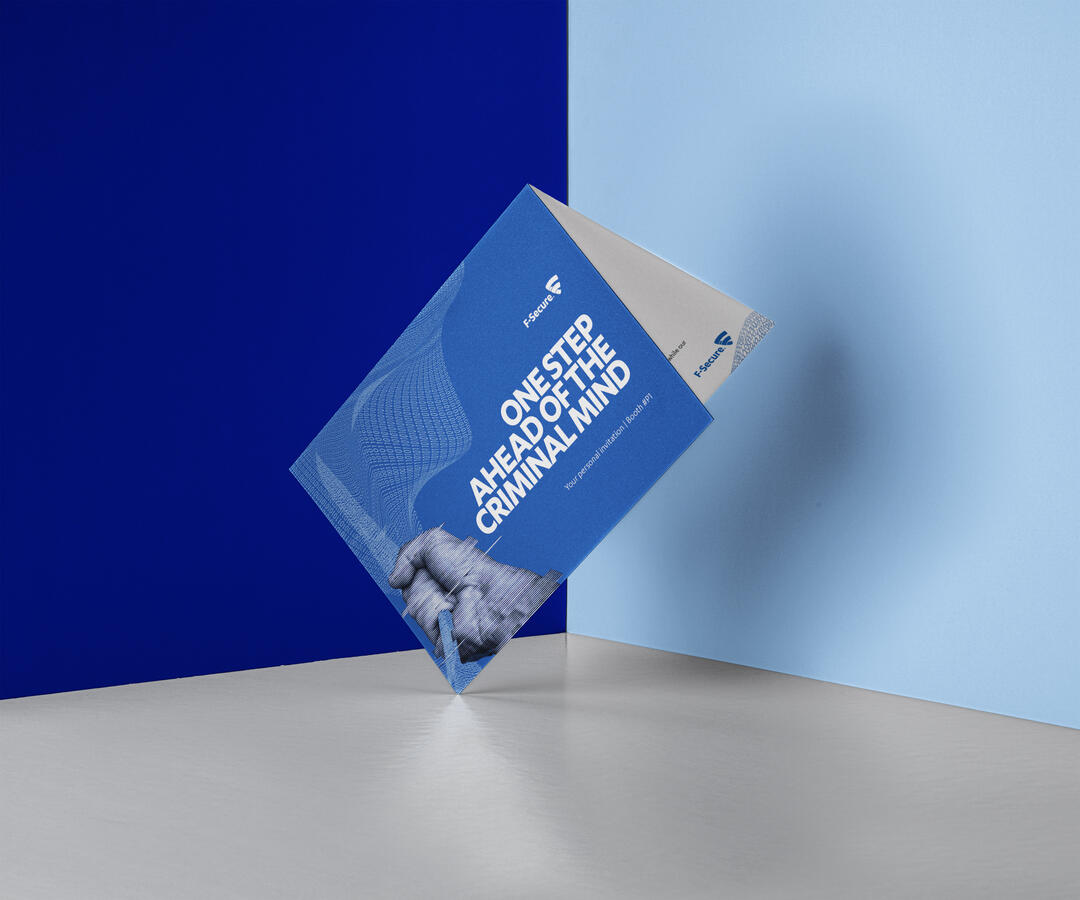
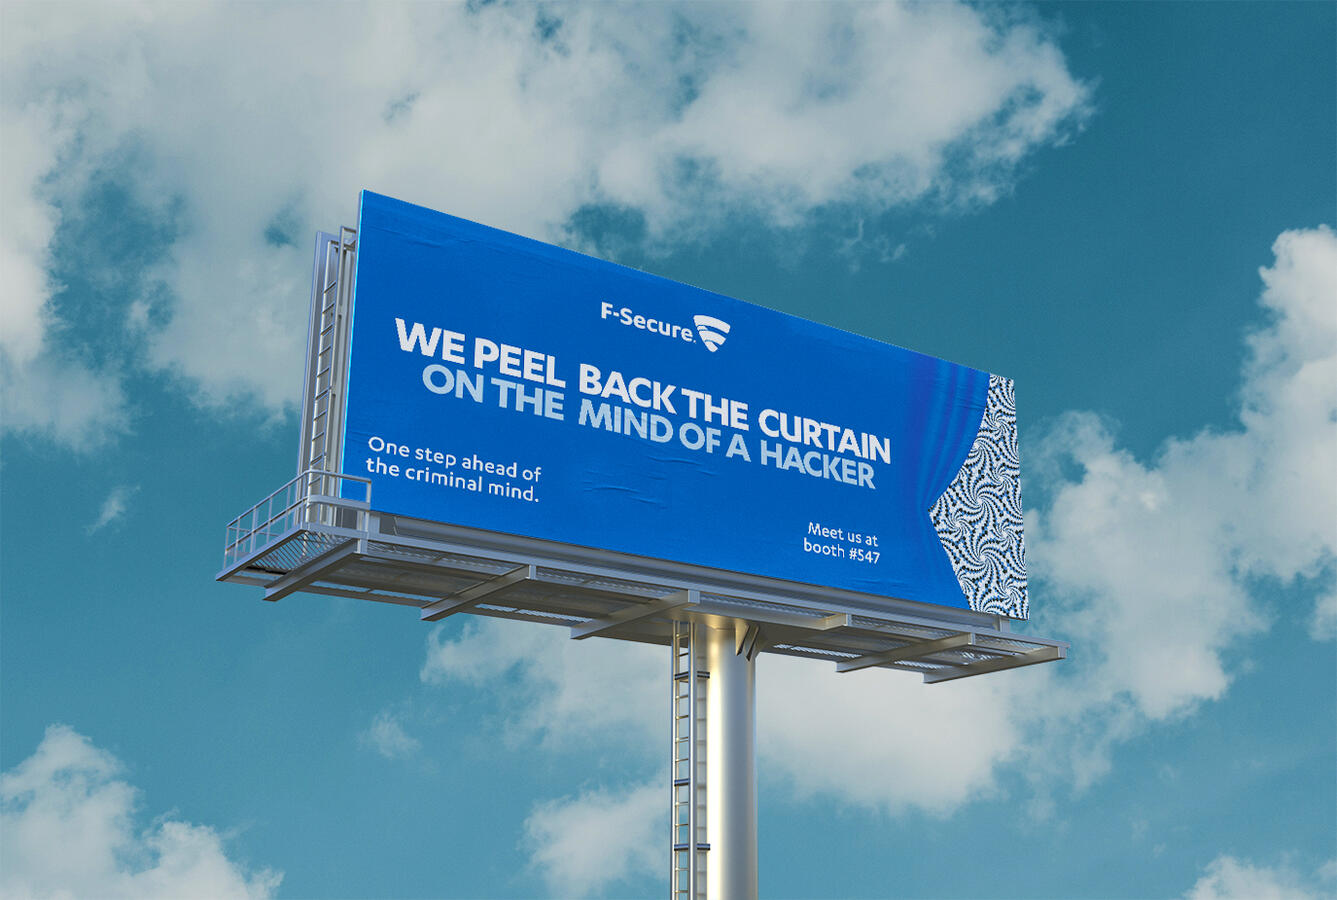
F-Secure

Parkman